All UCL staff and students have been granted upload privileges for Mediacentral. This page explains the upload process for your media content or even live video you capture with your webcam.
Before you upload
There is a limit of 5 GB for any one file which you wish to upload. If you are unsure or need to downsize your file please contact the Mediacentral team for advice.
Depending upon how busy Mediacentral is and the size of your media file, it can take a few minutes or even a few hours to transcode. You will receive an email telling you when your file is ready.
Login
To upload a video or audio file you have to Login to Mediacentral
Uploading a File
Ensure your file is no bigger than 5 GB, if you are unsure or need to downsize your file please contact the Mediacentral team.
- Select a file by clicking Upload on the site toolbar, that the big arrow at the top of the page.
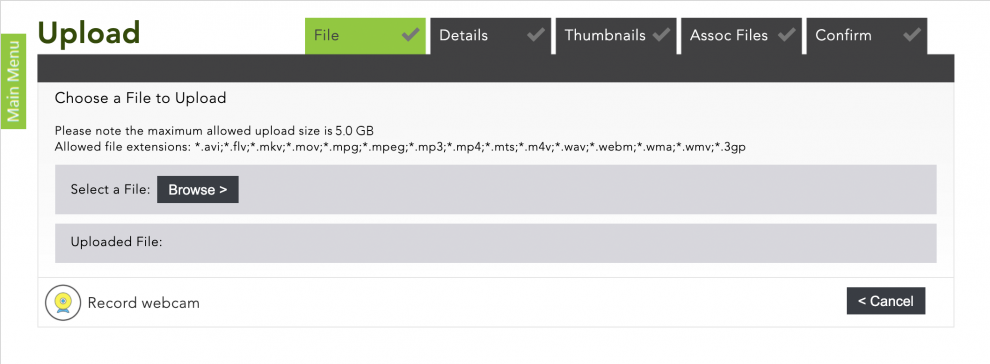
- When a new window opens (see image below), click Browse to select the file from your computer or device.
- Please be aware that content recorded on some older mobile devices produce a file which is incompatible with modern browsers, so always ensure your file is one of the supported versions The popular allowable file types are .mov, mp4 or .wmv (see the list in the image below)
- When you have added your file, a progress bar appears while the media uploads.
- Once the upload completes to 100%, click Next to enter the media details.
Recording from a Webcam
At this stage, rather than upload a video you can record a live video from a webcam connected to your computer by clicking the camera icon on the site toolbar. Please note that you need to be using either the Firefox or Google Chrome web browsers to use this facility. On the upload page, click on the Record webcam icon, then choose either Record Video (with audio) or Record Audio button.
Details and Required fields
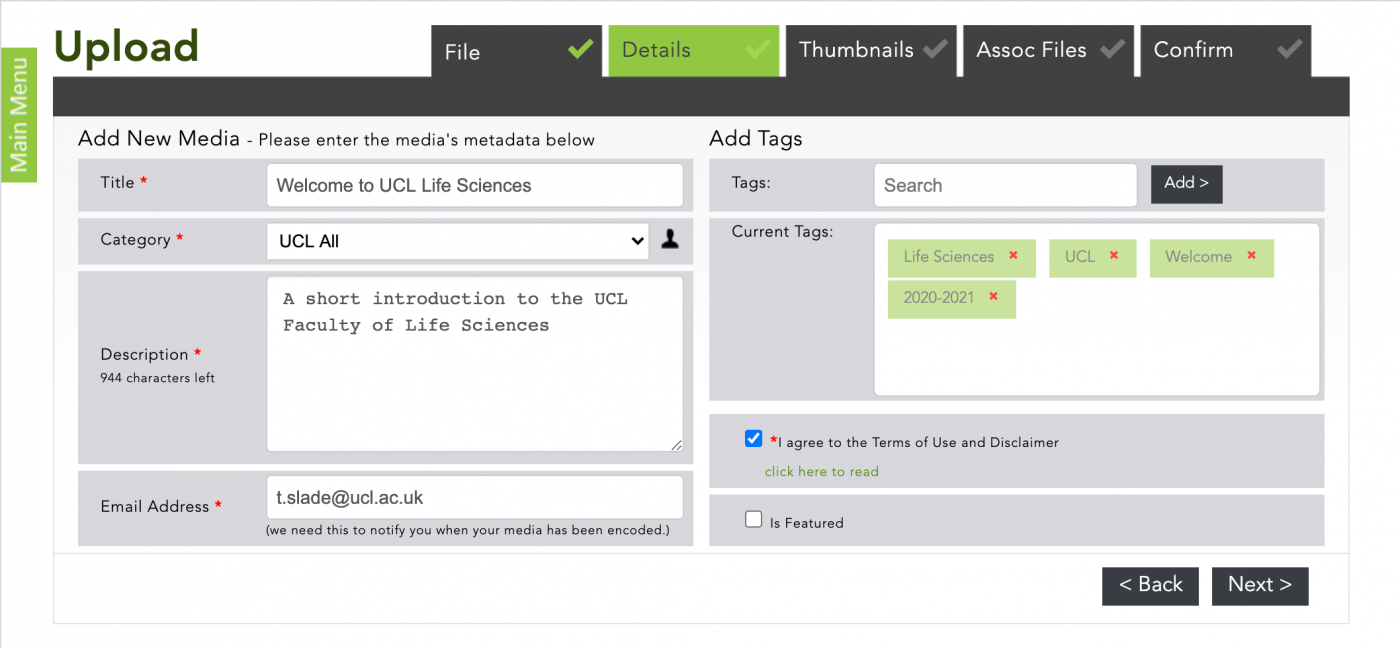
The required fields are:
- Title
- Category
- Description
- Email address
- Disclaimer checkbox, here you agree to the Terms of Use.
Although adding Tags is not mandatory, we suggest that you add some information which, relates to your video, this makes it easier for users to search and find your video. If you add a unique tag, this will allow a user to see all your media files.
For students, a tutor may suggest a using particular unique tag for your work, this method is useful for students when they are submitting assessed work, e.g. Module Name/Year.
If your video is just a Test file, please add the word TEST as a tag. Users Test files are removed from the system annually during the summer break and this helps the system administrators to ensure files are correctly deleted.
Categories
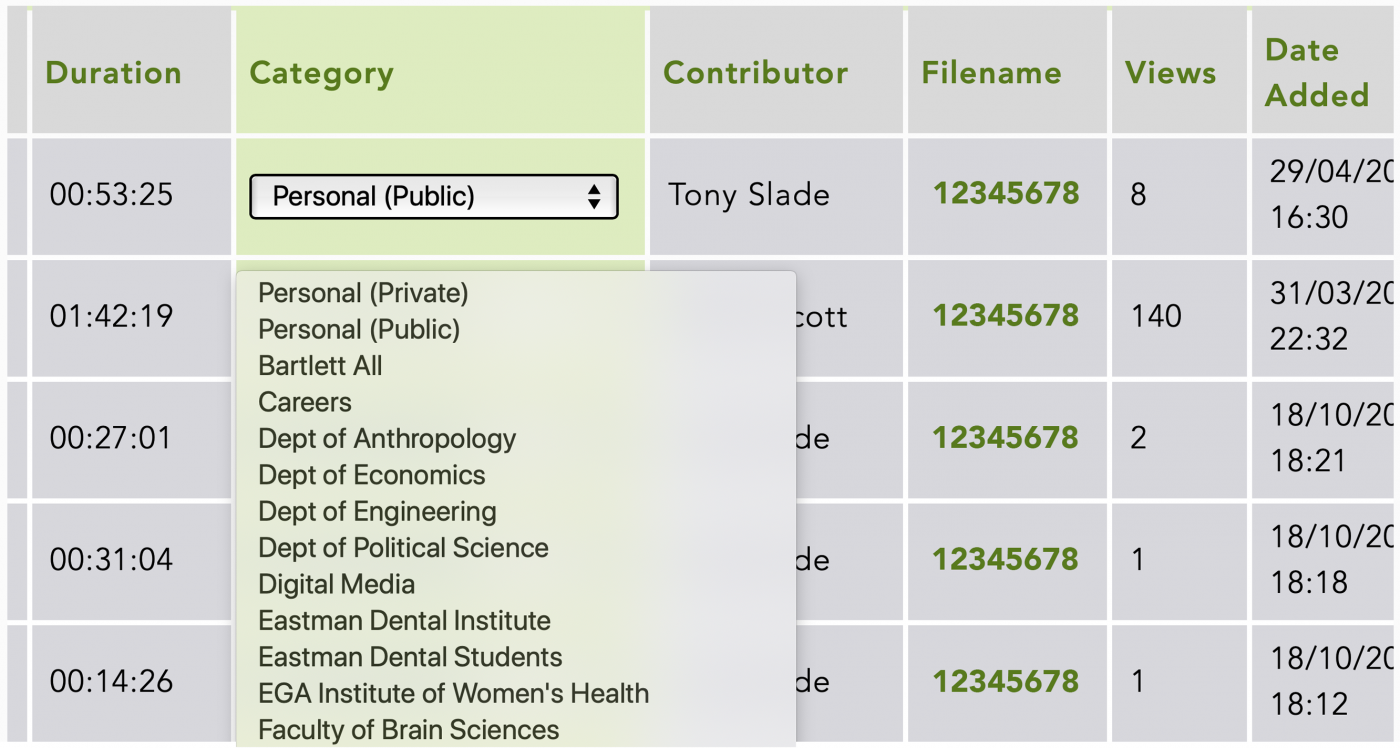
This function allows levels of access. Mediacentral is set up for users to share their content and to promote UCL to the wider world. However, you can restrict access by using the following sub-categories:
- The UCL All Staff category allows any staff member to view your content but they need to login to MediaCentral to view.
- The UCL All Student Category is just for the content which is specifically aimed at students rather than staff
- UCL All allows everyone at UCL to see your content, this requires users to login with their username and password
Always use one of the categories described. If you have content that is sensitive or that you think should be restricted in some way, please contact the Mediacentral team.
You may see a unique category e.g. Institute of Education when you are uploading or editing your content. Please do not choose these, unless you have been advised to do so, they are there for the content which has been previously defined as sensitive, or has some restriction to that Faculty or Department.
Personal (Private), Personal (Public) and Public Access
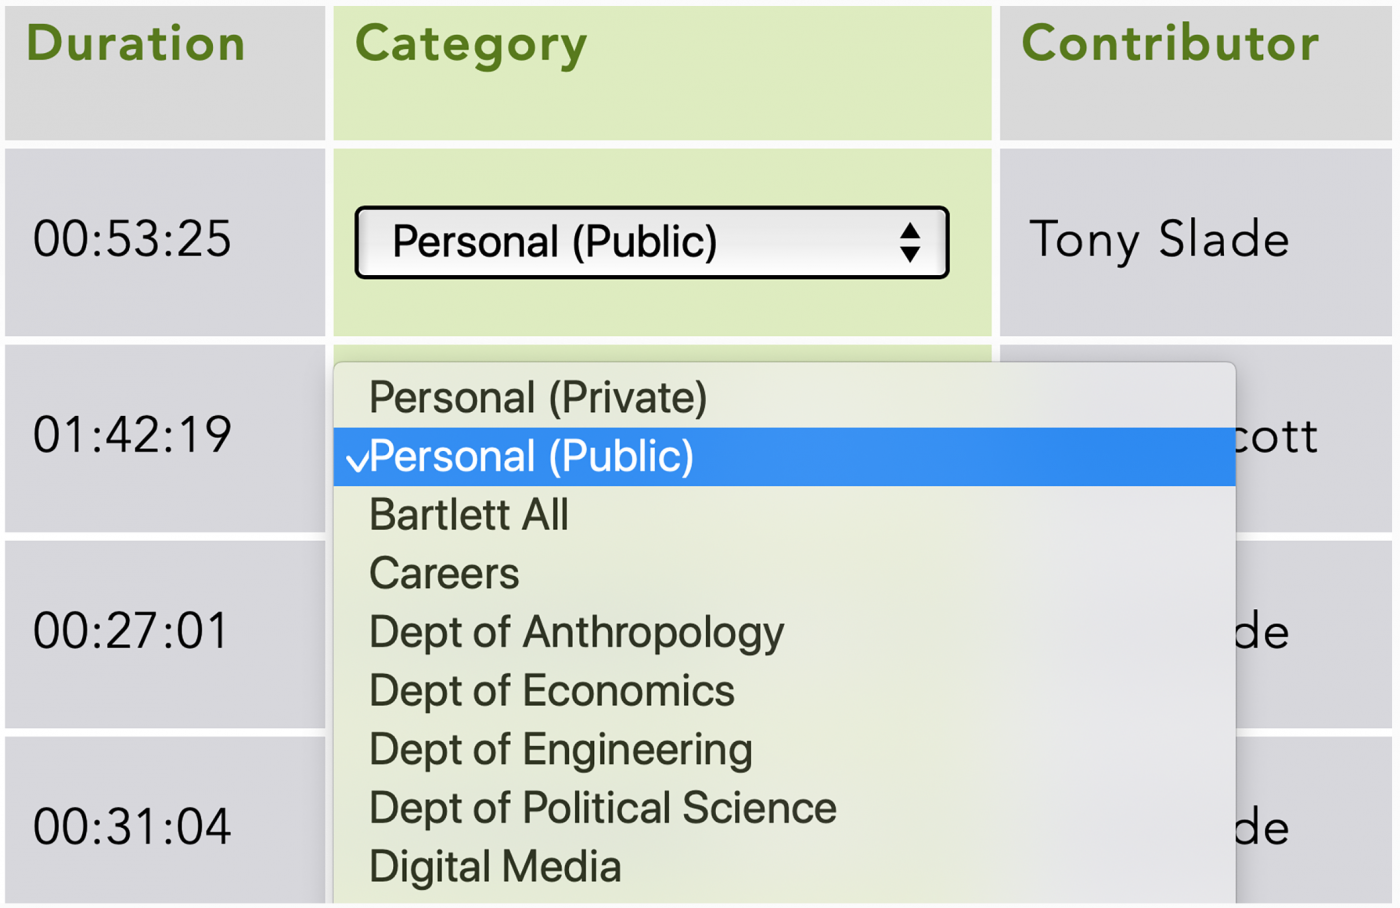
- The Personal (Private) category is private to you. Only you can view or hear the content. You cannot share this content with others
- The Personal (Public) category hides your video in the portal. This works really well if you want to show the video to others before changing to full Public Access, or if you want to let a select group view your video. To do this please use the Share link, this is the three-pronged icon on the top-right above your video.
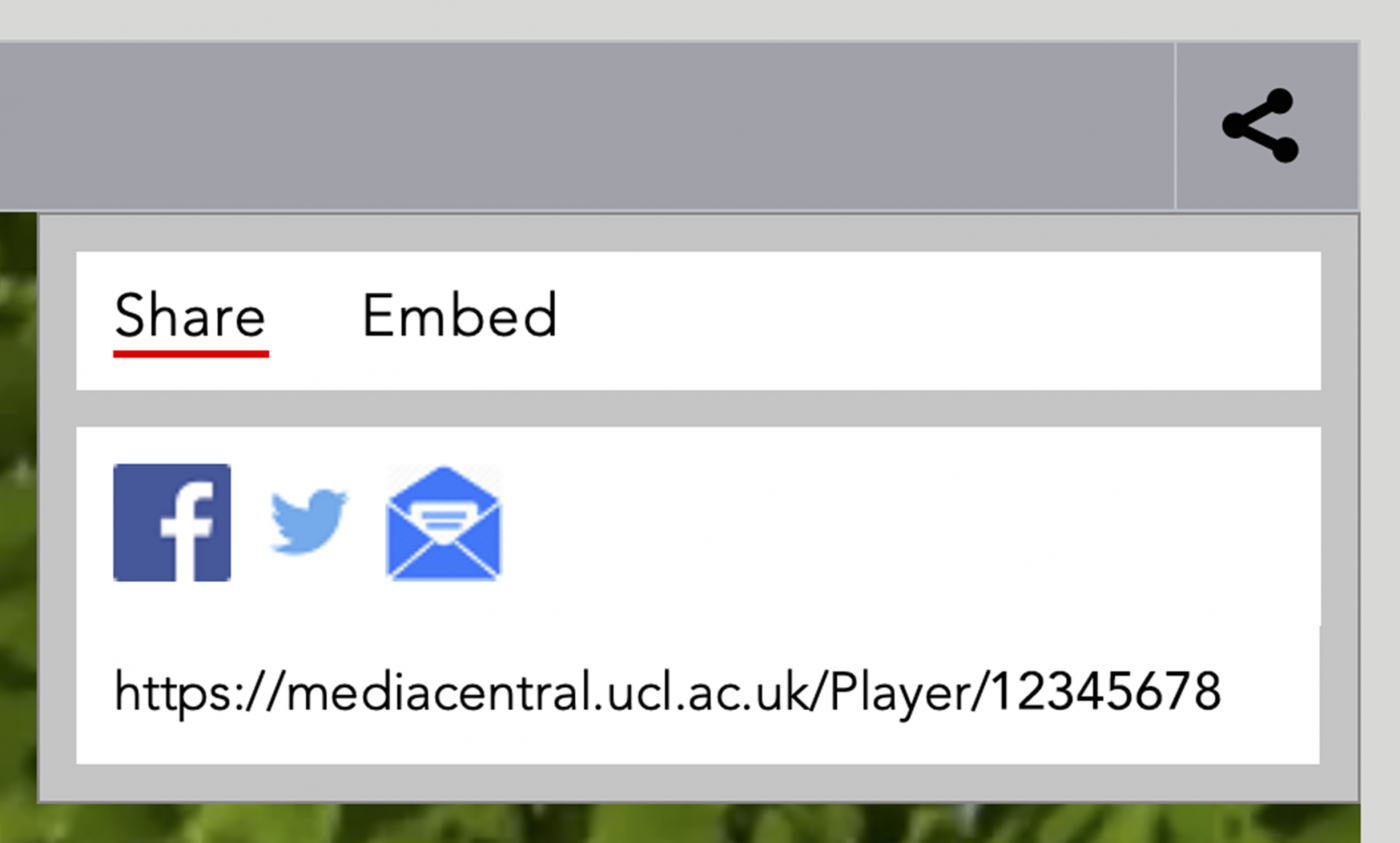
- Students wishing to share content with their tutors should use the Personal (Public) category especially if submitting work for assessment.
- The Public Access category allows your content to be viewed and downloaded by anyone. You can share this content via social media channels or using the Share link and a widget in Drupal, display content on UCL websites. For UCL WordPress sites use the Embed code.
Thumbnails
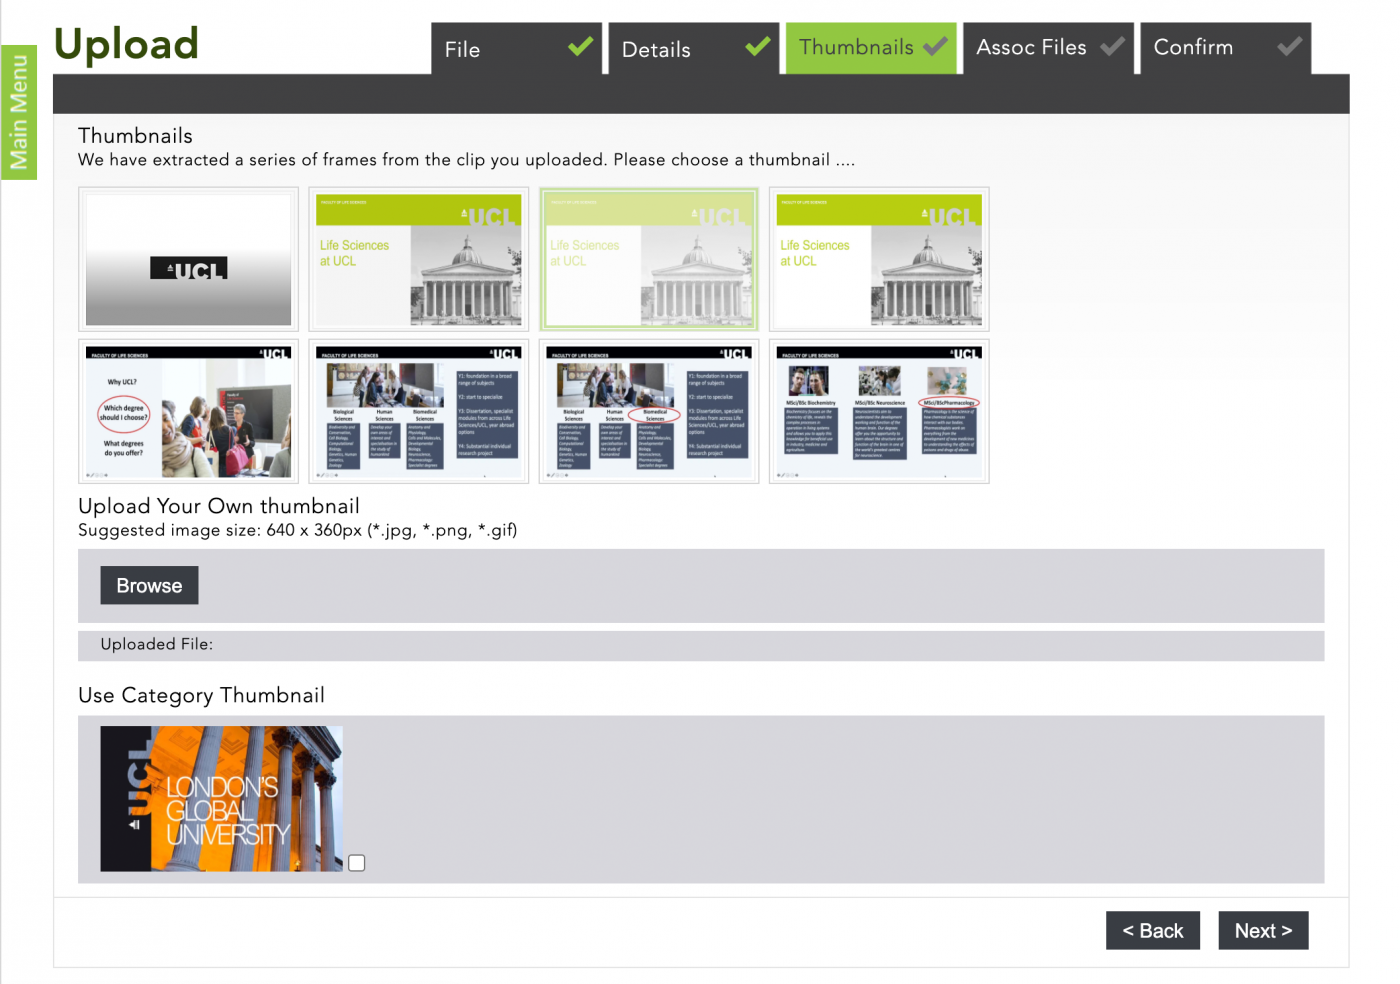
- The thumbnails screen presents eight thumbnails extracted from a video.
- Click a thumbnail to use it as the media preview on the library home page.
- If there is a category thumbnail, you can check that box to use that generic thumbnail instead.
- Alternatively, you can add your own thumbnail image. Click on the Browse button to find your image on your computer and Mediacentral will use this.
- For best results use an imagesized at 640px x 360px and formatted to either .jpg, .png or .gif.
- If the file is audio-only, an icon of a film reel is used in place of thumbnails. Ideally, you should add a personal thumbnail image for all audio files.
Associated Files
The use of associated files has been enabled. You can add a Captions file created outside of Mediacentral. You can also attach up to three additional files, such as a transcript or perhaps the PowerPoint file shown in your video, or a link to a URL.
Adding Captions and Captions File Formats
To add captions click on the Upload Captions button to start the process. Captions must be in either .srt, .vtt or .dfxp file format.
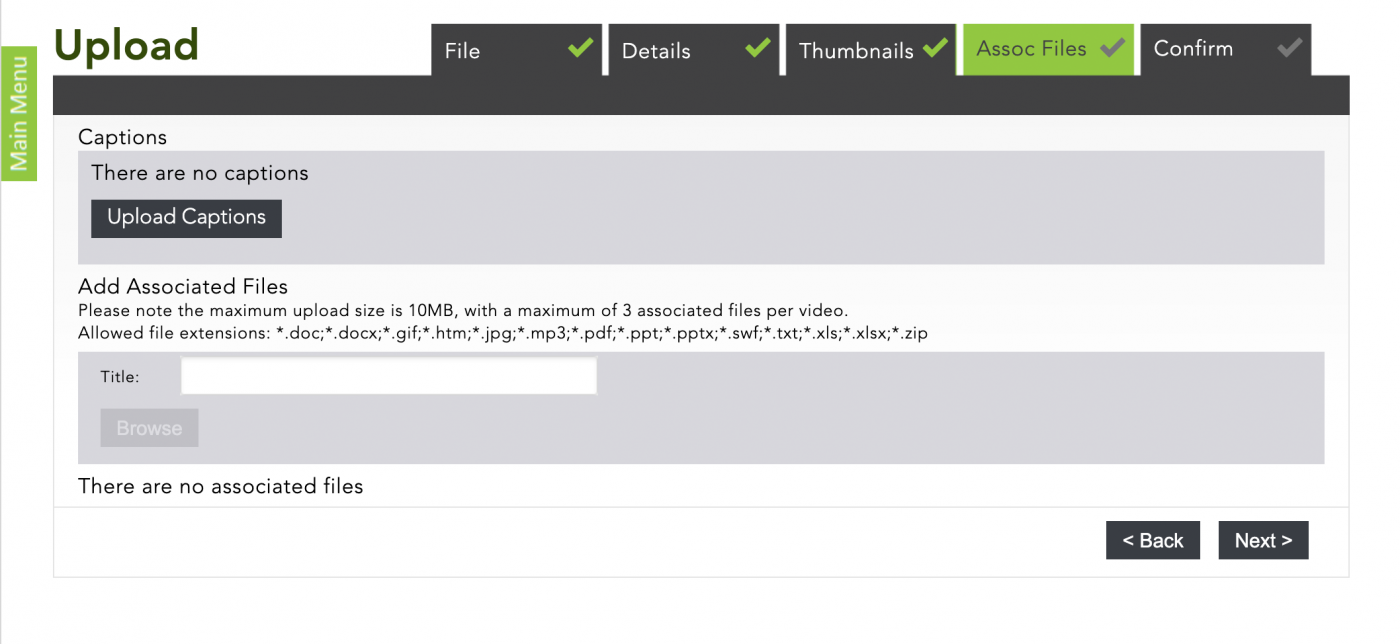
Then click on the Upload file button to choose the captions file on your computer.
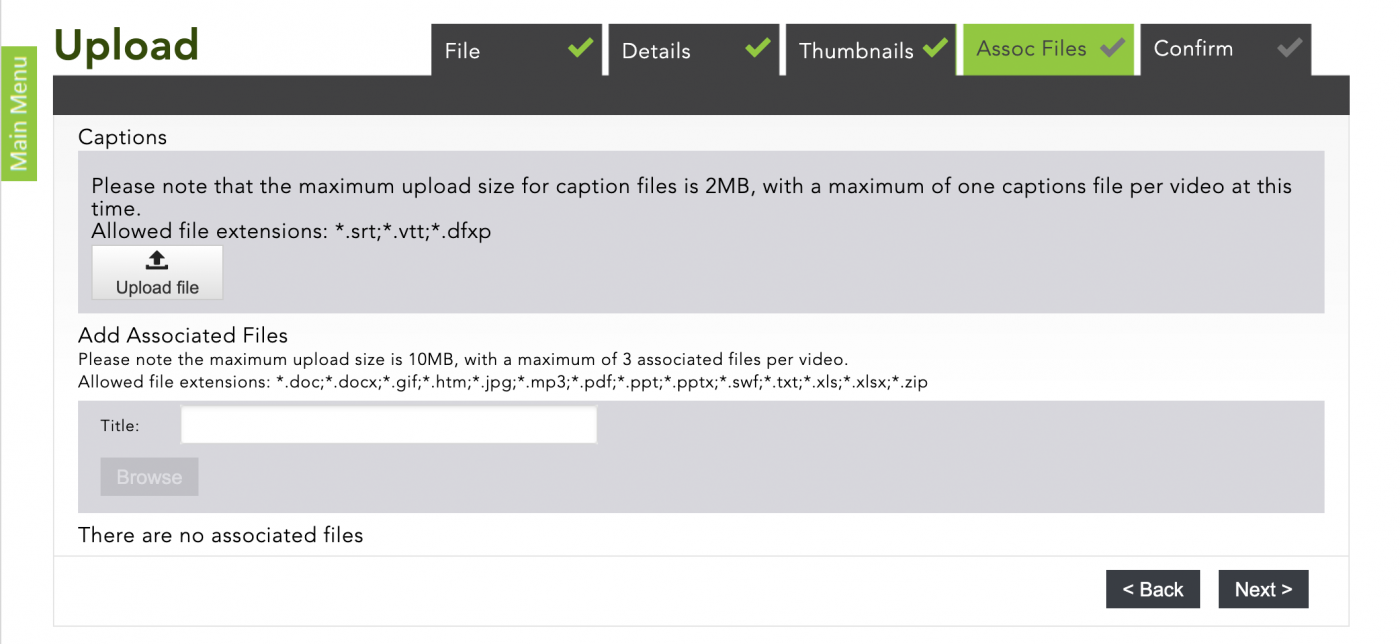
Once your file has been added you will see two new icons - a pencil and a waste bin, the pencil icon allows you to edit the captions and the bin allows you to delete the captions file.
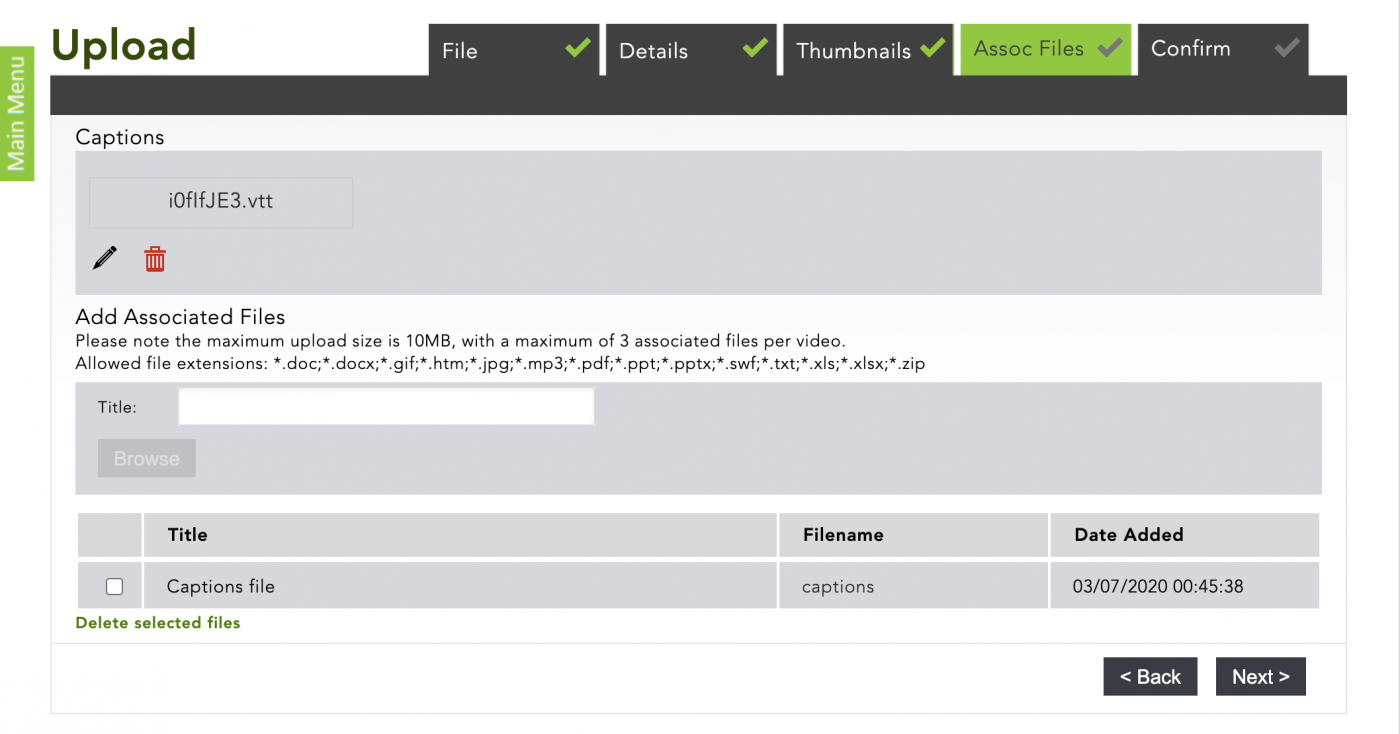
Associated Files and File Formats
To add additional files which, support your video then you need to type text in the Title box. The text should relate to the file you are adding.

The allowed file types are displayed above the title box, as seen below:
Then click on Browse to add the Associated File form your computer. Once the file has uploaded, click on Next.
Associated URLs
To add a URL, check the box and enter the URL. You can add a maximum of three files and/or URLs.
Associated File Deletion
When a file has been uploaded, it will be listed below the browse box. Should you make an error, you can delete the file by checking the box and clicking Delete selected files.
Upload Confirmation
The confirmation screen shows the media details. If you need to change the upload properties, use the tabs at the top of the wizard. Once all of the information is correct, click Finish on the confirmation screen. This submits your media to the encoder and takes you to your media content page, where you can preview the media once it has processed, as well as manage your media uploads.
 Close
Close


