Using USB storage devices with the Desktop@UCL PC service
This guide will explain how to use USB storage devices such as memory sticks or external drives with the Desktop @ UCL PC service.
If you are accessing Desktop @ UCL via the Anywhere service, please see the related guides section at the end of this guide.
Note: We recommend that you use one of the UCL-supported encrypted USB memory sticks as these are both secure and fully supported for use with Desktop @ UCL.
This guide is aimed at...
- Staff
- Students
- Visitors
- IT Administrators
- SLMS staff
- Researchers
Before you start...
- A computer running Desktop @ UCL or Windows 7
- If you are using Desktop @ UCL, you need to have logged into Desktop @ UCL PC or Desktop @ UCL Anywhere services
- A USB storage device such as a USB memory stick or external drive
Instructions
Contents
Using USBs
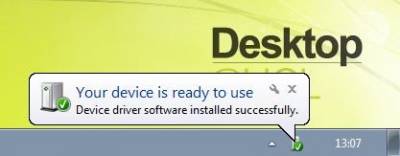
1. When you log in, plug your USB key into the port on your Desktop @ UCL PC. A message will appear stating Your device is ready to use.

Fig 1 – Your device is ready to use message
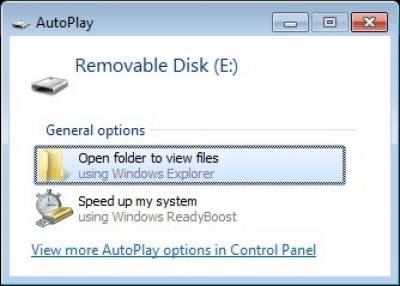
2. You may then get a pop-up box which will give you a few options. You will need to select the option Open folder to view files

Fig 2 – Autoplay pop-up screen options
Removing your USB key
3. To remove the key, you must eject the device first in order to remove it safely. You can find the Safely Remove Hardware and Eject Media USB icon in the bottom right hand corner of your screen.
Fig 3 - Safely Remove Hardware and Eject Media USB icon
However if the USB icon is hidden, please follow these instructions.
· In the system tray, you will need to select the arrow to show hidden icons.
Fig 4 – Show hidden icons
The following box will pop up.
Fig 5 – Safely Remove Hardware and Eject Media USB icon
4. Click the Safely Remove Hardware and Eject Media USB icon and a list of removable storage devices will be displayed.
Fig 6 – Eject device option
5. Select the storage device you wish to eject. Once you have done this, you will see a message displayed stating Safe to Remove Hardware. You can now physically remove the device from the computer.

Fig 7 – Safe to Remove Hardware message
Related guides & other info
- Using USB sticks with Desktop @ UCL Anywhere via Citrix Receiver
- Encrypted USB sticks supported on Desktop @ UCL
- Scanning for viruses on Desktop @ UCL
Help & Support
For further help and assistance you will need to contact the IT Services.
Feedback
We are continually improving our website. Please provide any feedback using the feedback form.
Please note: This form is only to provide feedback. If you require IT support please contact the IT Services Help desk. We can only respond to UCL email addresses.
 Close
Close

