 Close
Close

Setting up a new laptop with Desktop@UCL pre-installed
How to set up a new Dell laptop that has been sent directly to you with Desktop@UCL pre-installed.
This guide is aimed at
- Staff
Before you start...
- A new and boxed laptop with Desktop@UCL pre-installed
- An internet connection
- Your UCL user ID and password
Video guide
Instructions
- Unbox the laptop.
- Connect the laptop to the power adapter and mains.
- Turn on the laptop.
- At the setup screen (Fig.1) connect the laptop to the internet. If you have an ethernet cable that will provide internet access, connect it and skip to step 7. To connect to a Wi-Fi network, click the globe icon in the bottom right to view a list of available wireless networks.

Fig.1 – Step 1 Connect to the internet - Select your wireless network from the list (Fig.2).
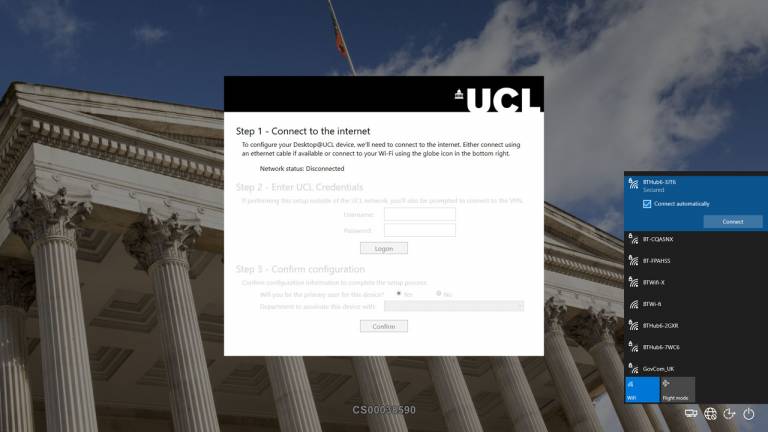
Fig.2 – List of wireless networks - Enter the requested information for your wireless network. If you are at home this will likely be a single password (Fig.3). If you are at a UCL location and connecting to eduroam this will be your UCL credentials.
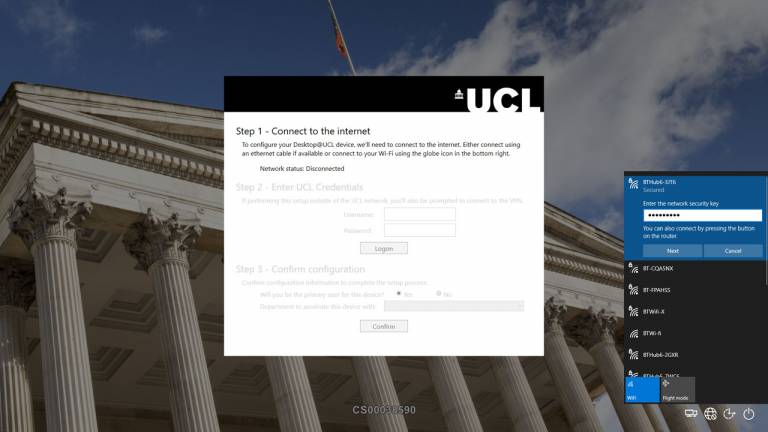
Fig.3 – Enter network security key - Once connected Step 2 - Enter UCL Credentials will become active (Fig.4).
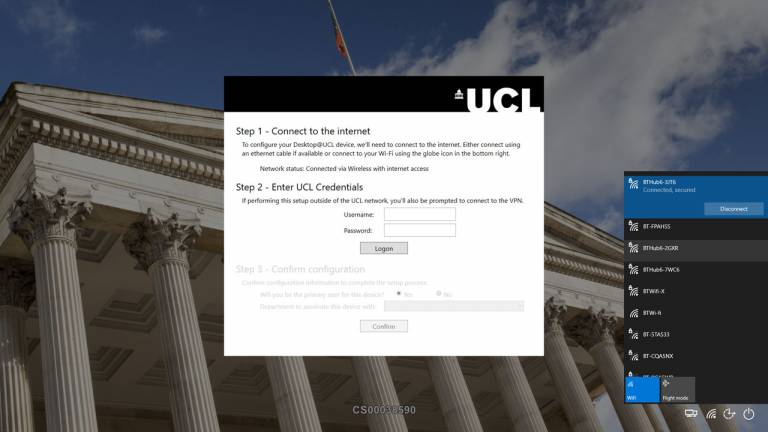
Fig.4 – Step 2 Enter UCL Credentials - Enter your Username and Password and click Logon.
If connecting from outside of UCL a prompt for Cisco AnyConnect will appear (Fig.5) – Enter vpn.ucl.ac.uk/Prelogin in the box and click Connect. If connecting from within UCL this will not appear – skip to step 11.
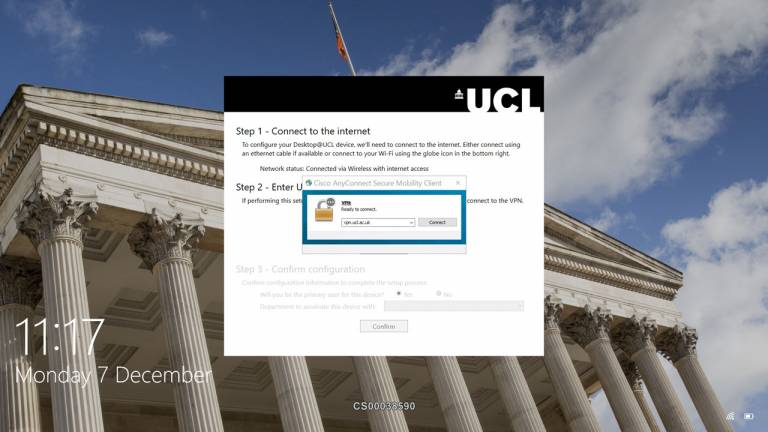
Fig.5 – VPN ready to connect - Enter your Username and Password and click OK.
- Once connected Step 3 - Confirm configuration will become active (Fig.6). If you are the primary user for the device select Yes and confirm your department. If the device is not going to be primarily used by you or it will be a shared device you should select No.
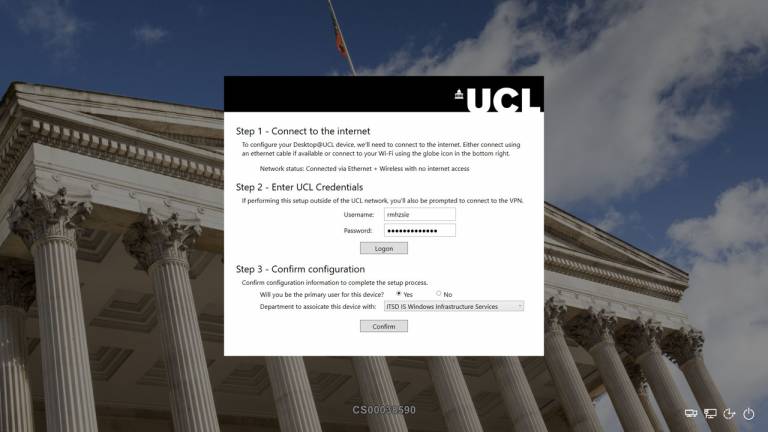
Fig.6 – Step 3 Confirm configuration - Once the configuration has been confirmed you will see a Configuration complete message (Fig.7). Click OK.
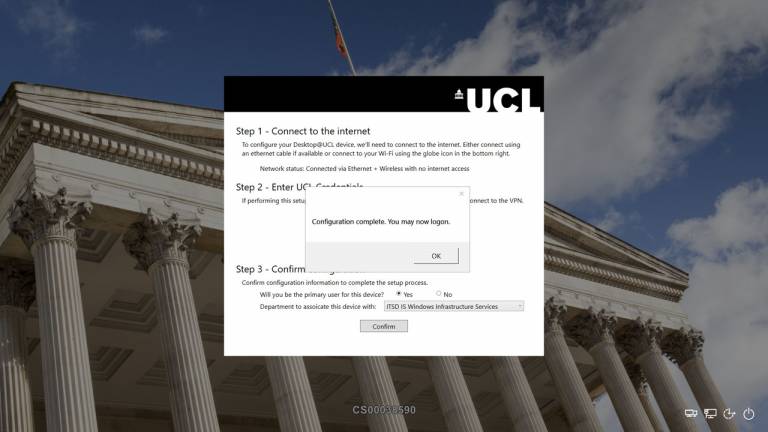
Fig.7 – Configuration complete message At the standard Desktop@UCL sign in screen (Fig.8) logon as normal.
Please note: The first time you logon your N: Drive will begin synchronising. Depending on how much data is in your N: drive and your connection speed this may take a long time. We recommend staying connected for at least 15 minutes for essential files to synchronise.
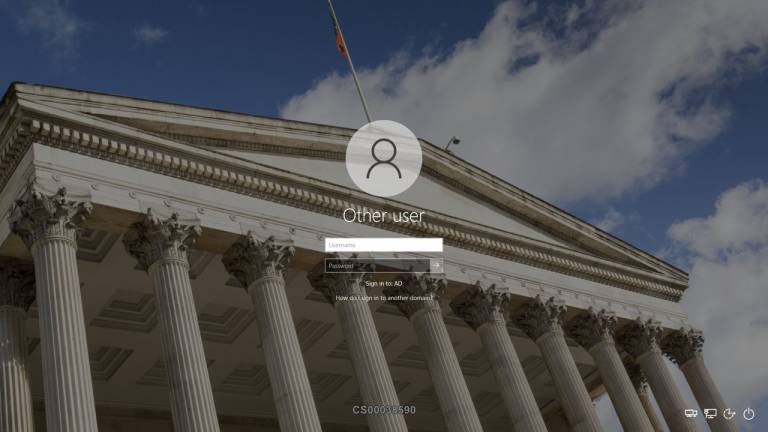
Fig.8 – Standard Desktop@UCL sign in screen
Feedback
We are continually improving our website. Please provide any feedback using the feedback form.
Please note: This form is only to provide feedback. If you require IT support please contact the IT Services Help desk. We can only respond to UCL email addresses.