 Close
Close

Request a database
This guide explains how to request a new database using the Database Request Portal.
This guide is aimed at:
- Staff
- IT Administrators
- SLMS staff
- Researchers
Before you start...
- Please use Google Chrome. This process will not work in Microsoft Edge or Firefox.
- Only request one new database service at a time.
- You cannot go back in the portal. If you have made a mistake you will need to start the request again.
- The portal will automatically create a Remedyforce ticket with your request. You do not need to create Remedyforce ticket manually.
- This process is only for requesting a shared database service. If a dedicated database VM (virtual machine) is required please contact the DBA Services team.
- As this is a shared database service, there will be other databases running on the same VM.
Instructions
Go to the Database Request Portal
- You will log in via Single Sign-on (Fig.1)
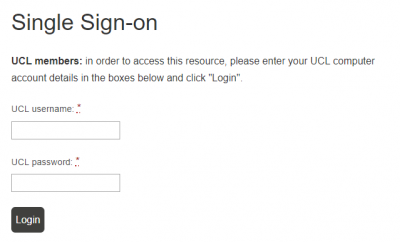
Fig.1 - Single Sign-on screen Your User ID will be auto-populated. Please do not change this.
Enter your Database Name. The URL below provides guidance on generating the name for your database. The portal will restrict you entering names that do not align to the Database Design Standards.
Note: For all database types the portal will append your database with the correct environment post fix so you do not need to include this in your database name.
- Select your Database Type. The three shared database services offered by the team are:
MySQL
Oracle
Microsoft SQL Server Select your Database Environment from the options below. The environment you select will impact the cost as the higher environments will be hosted across both data centres.
Dev
UAT
PreProd (always dual site)
Production (always dual site)
Training
ScratchPress Next
Select the Database Version for the Database Type you have selected.
Note: By default the Database Version will go to the latest version offered by the database team, this should only be changed if there is a specific requirement (i.e. an application requires an earlier version of the database).
Select the Database Compute Size (amount of memory that you think the database will require). A number of ranges are offered which differ depending on the database type selected. It is understood this will be an estimate.
Note: If the expected memory required is above the highest figure offered then the database is likely to require a Silo VM. Please discuss this with the DBA Services team.
Select the Database Storage Size (amount of storage) you think the database will require. A number of ranges are offered below. It is understood this will be an estimate.
XS (up to 1GB)
S (1-10GB)
M (11-50GB)
L (51 – 250GB)
XL (251 – 1000GB)Note: If the expected storage required is above the highest figure offered then the database is likely to require a Silo VM. Please discuss this with the DBA Services team.
- The default Number of Concurrent Connections is 100. If you believe that your database will require less than 100 then no action is required. If you feel more than 100 connections will be required then please update the value.
The Database Availability will default to either regular or high dependant on the database type and environment chosen. If availability defaults to high it cannot be changed. However, if it defaults to regular, the user has the option of changing it to high.
Note: High availability means that the database is hosted across both UCL datacentres – this doubles the cost.
- Select your required Database Duration (between 1 and 5 years)
- Press Next
Select your ISD Service Catalogue Details - Business Unit and then press Next
If your Business Unit is not available but is listed on the Services IDs and Business Unit Allocation page, please raise a ticket with Hybrid Infrastructure.
Select your ISD Service Catalogue Details - Service ID (the drop down is refined based on the Business Unit selected) and then press Next
If your Service ID is not available but is listed on the Services IDs and Business Unit Allocation page, please raise a ticket with Hybrid Infrastructure.
Application Details are only required if the database is created by the application. If this is not the case then no changes are required. Please press Next.
If the database is created by the application then tick the box and provide the application name that will be creating the database.
The Maintenance Window is defined based on the environment selected, the only environment with any flexibility for selecting the maintenance windows is Production all others are the default.
Note: The maintenance windows offered align to the OS patching schedules.
If the request is not for an Oracle server the Oracle Table Space and Application Server Names fields will default to N/A and can be ignored.
If the request is for an Oracle server please add the details if known. If not known then please state N/K. They are not mandatory fields.
Press Next
Please enter any Additional Information that you think will be useful for the DBA Services team to complete the request and then press Next
For example:
Session limits to be default to 3600 seconds, expect peak usage 9 am – 1pm. Application can crash if database is not available after 10 connection attempts.
- The portal will provide a summary (Fig.2) of the database requested. This summary will also be emailed to you for information.
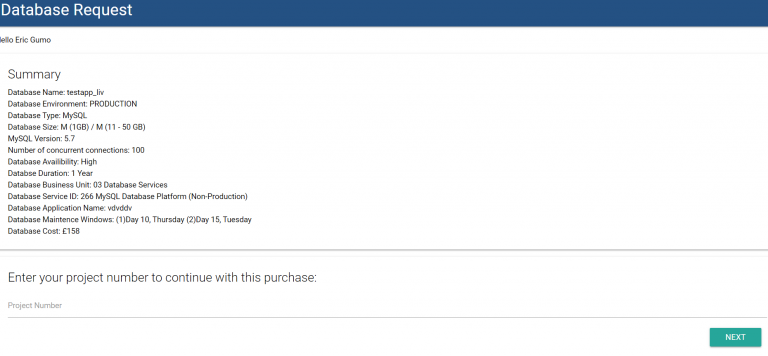
Fig.2 – Database request summary screen - To proceed to purchase enter your Project Number and press Next. If your project is not available in the portal then please raise a ticket with the Hybrid Infrastructure team to rectify.
- Enter your Task Number and press Next
- The portal will provide a summary of the database requested, the PTA code and the total cost (Fig.3) If everything looks correct, tick Yes to confirm procurement and press Submit.
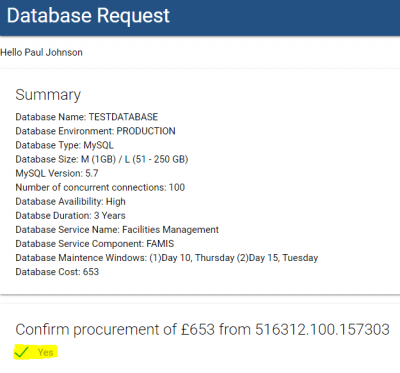
Fig.3 – Confirm procurement screen - The portal will then submit the request to Remedyforce and an SR will be returned (Fig.4)

Fig.4 - Service request ticket has been created screen
Feedback
We are continually improving our website. Please provide any feedback using the feedback form.
Please note: This form is only to provide feedback. If you require IT support please contact the IT Services Help desk. We can only respond to UCL email addresses.