How to use the Bulk Upload function in the Services System
Step-by-step guide to creating multiple visitor records and requests simultaneously.
This guide is aimed at:
- Staff
Before you start...
In order to speed up the process of creating a number of visitors at once we have added a bulk upload feature to the Services System. The process of creating visitors and requesting services in bulk is split into three steps, described below.
To access the bulk upload feature, login to the Services System in the normal way and go to the Create Visitors in Bulk link.
Having launched the Visitors Bulk Upload facility, you'll need to click on Visitors bulk upload and instructions and template down load to enter details for your visitors. Be aware of the limits listed below on the size of each field (in characters). Fields marked * are mandatory. You can upload a maximum of 100 records at a time.
| FIELD | LENGTH |
| UPI | 7 |
| First Forename* | 30 |
| Surname* | 60 |
| Title | 15 |
| Initials | 15 |
| Sex* | 1 |
| Date of Birth* | 10 (dd/mm/yyyy) |
| Other Forenames | 30 |
| Previous Surname | 60 |
| NI Number | 20 |
| Known As | 20 |
| Home Email | 50 |
| Home Telephone | 50 |
| Mobile | 50 |

Once you have entered details for all the visitors you wish to create, save the spreadsheet (retaining the XLSX format) on your computer. Return to the Visitors Bulk Upload screen and click on the BROWSE.. button. Navigate to the spreadsheet you just saved using the dialogue box that appears. Click Process Excel to upload the file.
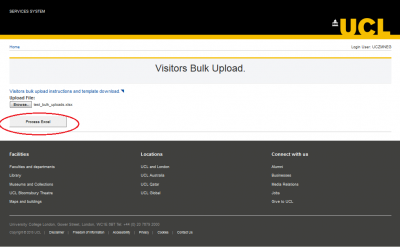
A basic check on the file is done to ensure that there are neither too few nor too many records to upload. A check is also carried out to ensure mandatory fields are entered for each record. If these checks fail an error will be displayed in red.
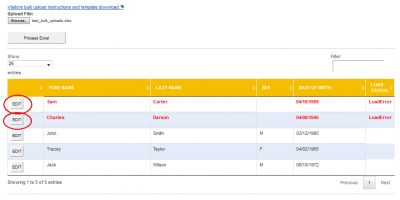
The records uploaded from your spreadsheet will be displayed in a grid where any errors will be highlighted in red for you to correct. Entries that are too long or the wrong format are typical causes of errors.
Records can be corrected by pressing the EDIT button next to a record, making the correction and then pressing SAVE.
Once the records have been corrected, save the records and click AUTO SELECT. A warning message appears stating the record can no longer be edited and if you wish to continue. Click Yes.
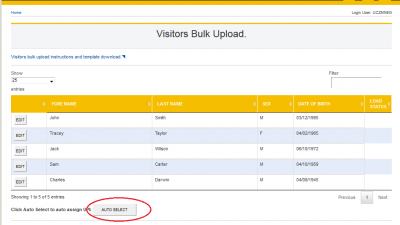
This stage of the process involves searching for and either selecting an existing UPI to match the visitors you are creating or generating a new UPI for them.
Clicking on Auto Select will start the process of searching for possible matches and assigning UPIs where possible. Depending on the number of records this process may take a few minutes however no user intervention is required once the process has started.
At the end of the process a summary of results will be displayed.
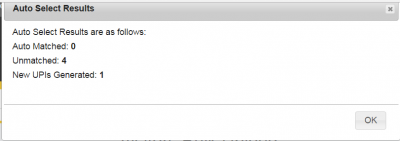
If there are no possible matches, a UPI will be generated for the record in question. Where a possible match is found with a very high probability that it matches the visitor details the existing UPI is automatically assigned. Where multiple matches are found and none are determined suitable for automatic assignment of a UPI you will need to select the correct UPI from a list of possible matches.
At the end of the auto select process the records are filtered to only show those that require manual intervention. At this stage it is necessary to select from the list of possible matches for a record, or generate a new UPI if appropriate.
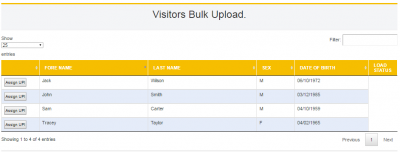
Once all the records have had an existing UPI assigned or new UPI generated, you can select the Visitor Type, Organisation, Start Date and End Date of the visit. You can also request various services (depending on the type of visitor type) and then press Process.
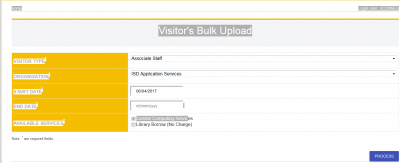
You will receive a message to state that the bulk upload has been processed successfully.
Feedback
We are continually improving our website. Please provide any feedback using the feedback form.
Please note: This form is only to provide feedback. If you require IT support please contact the IT Services Help desk. We can only respond to UCL email addresses.
 Close
Close

