Connect/log in to Thunderbird (Linux)
You can set up Thunderbird for Linux to connect to the live@UCL service.
This guide is aimed at...
- Staff
Before you start...
Testing specification:
- Ubuntu 12.04 LTS
- Thunderbird 24.4.0 (for Linux)
- ExQuilla for Microsoft Exchange 24.6 (Add-On)
- Lightning 2.4.6 (Add-On)
- Calendar EWS Provider 3.2.0 Beta52 (Add-On)
IMPORTANT: This instruction guide has been created as a reference for anyone that uses Thunderbird on Linux machines and wishes to also access their UCL Global Address List (GAL) and Calendar using the EWS protocol. Please note that these features are NOT currently supported by the ISD IT Services and any user’s having technical issues whilst following this guide are expected to use third party services and forums for guidance.
Connecting Thunderbird using EWS will allow you to access the UCL Global Address List and UCL exchange calendar. You will need to have the following add-on’s installed in Thunderbird before setting up your UCL email account.
- ExQuilla for Microsoft Exchange (available from Thunderbird Add-Ons library)
- Lightning Calendar (available from Thunderbird Add-Ons library)
- Calendar EWS Provider (available from GitHub)
Note: Should the links not work, please notify the ISD IT Services and we will update this where appropriate.
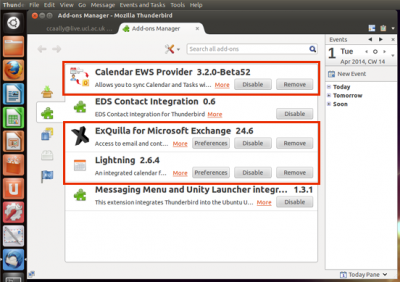
Fig 1. Thunderbird Add-ons Manager
View a larger version
Instructions
Connecting your UCL email with Thunderbird using EWS protocol
1. Open Thunderbird and click on ExQuilla which is located under the Create a new account: section on the home screen.
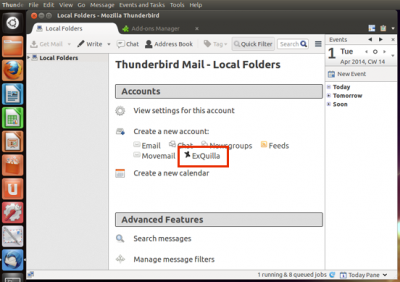
Fig 2. Location of ExQuilla
View a larger version
2. The Identity window will appear asking you to enter your Email address and Password.
Email address: Your UCL email address e.g. userID@live.ucl.ac.uk
Password: Your UCL password
Enter the necessary details and click Next.
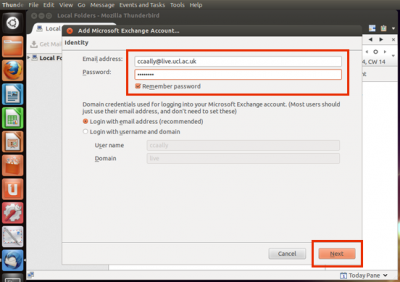
Fig 3. The Identity window
View a larger version
3. Now click on the do auto discover button so that Thunderbird can automatically locate your account from the Microsoft exchange server.
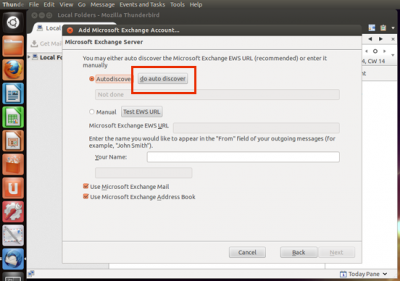
Fig 4. The do auto discover button
View a larger version
4. You should now get two green indicators suggesting Thunderbird has successfully located your account and filled in the required fields for you. Click Next.
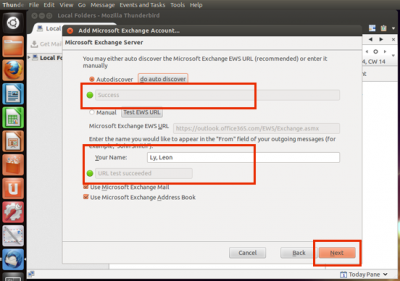
Fig 5. Example of the green indicators
View a larger version
5. Check that your account details are correct and click Finish.
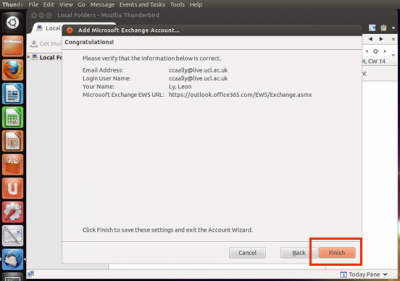
Fig 6. Summary of account details and location of the Finish button
View a larger version
6. You have now successfully set up your UCL email account on Thunderbird using EWS protocol.
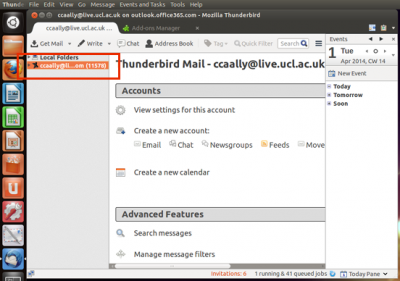
Fig 7. Example of an successful account setup
View a larger version
Setting up your Exchange Calendar
To set up your UCL calendar using Thunderbird:
1. Select the File menu and then select New > Calendar…
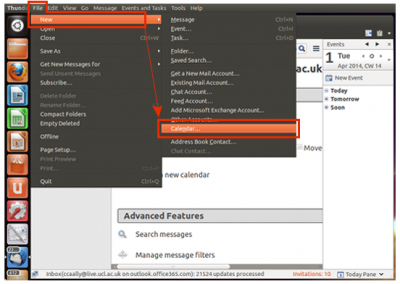
Fig 8. Location of the Calendar option
View a larger version
2. Now select On the Network option and click Next.
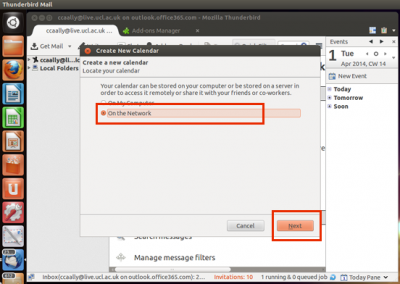
Fig 9. Location of the On the Network option
View a larger version
3. Select Microsoft Exchange 2007/2010/2013 and click Next.
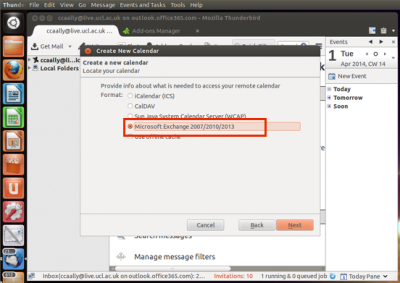
Fig 10. Location of the Microsoft Exchange option
View a larger version
4. Type in a name for your UCL calendar e.g. UCL calendar. Click Next.
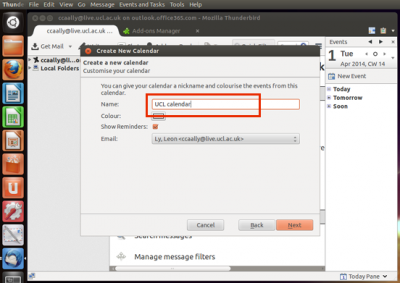
Fig 11. Illustration of entering a new calendar name
View a larger version
5. Check the Use Exchange’s autodiscovery function check box and then click the Perform autodiscovery button.
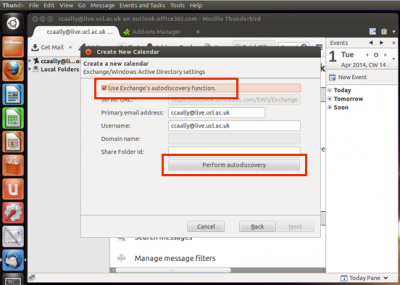
Fig 11. Location of autodiscovery options
View a larger version
6. You will be prompted to enter your account password before Thunderbird attempts to find your calendar. Enter your UCL email password and then click OK.
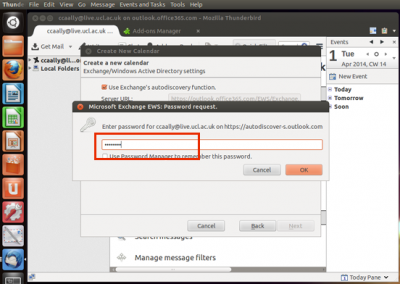
Fig 12. Password box
View a larger version
7. Your EWS server location should be https://outlook.office365.com/EWS/Exchange.asmx. Check that this is correct and click Select.
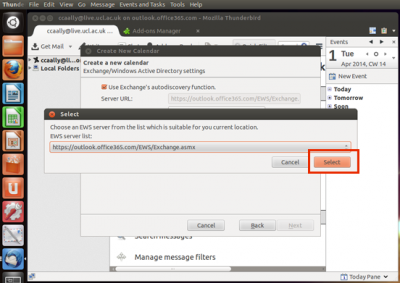
Fig 13. EWS server location box
View a larger version
8. Click Next again to confirm the details are correct and create the calendar.
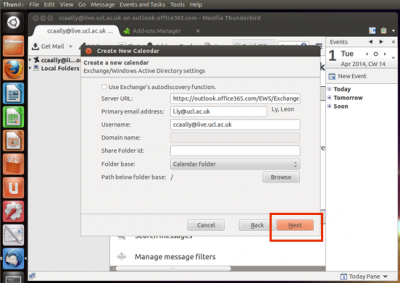
Fig 14. Confirm the details window
View a larger version
9. Your calendar should now have successfully created your calendar. Click Finish.
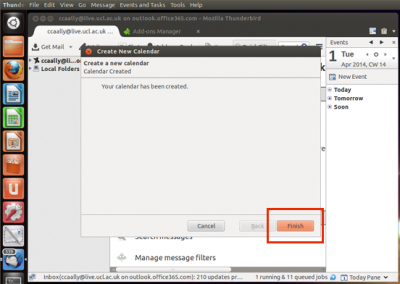
Fig 15. Location of the Finish button
View a larger version
10. To open your calendar, select Events and Tasks from the menu bar and select Calendar.
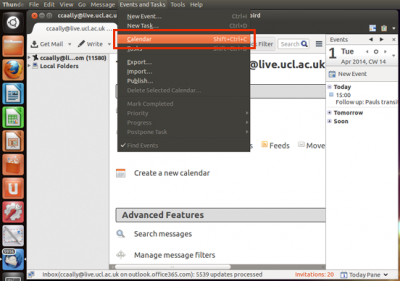
Fig 16. Location of the Calendar option
View a larger version
11. You should now see your UCL Calendar in Thunderbird.
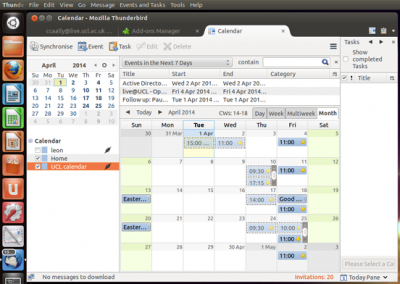
Fig 17. Example of a calendar in Thunderbird
View a larger version
Feedback
We are continually improving our website. Please provide any feedback using the feedback form.
Please note: This form is only to provide feedback. If you require IT support please contact the IT Services Help desk. We can only respond to UCL email addresses.
 Close
Close

