 Close
Close

Below is step-by-step guidance on how to use the CMISgo room booking system when booking and managing the booking of centrally bookable space.
Logging onto CMISgo room booking system

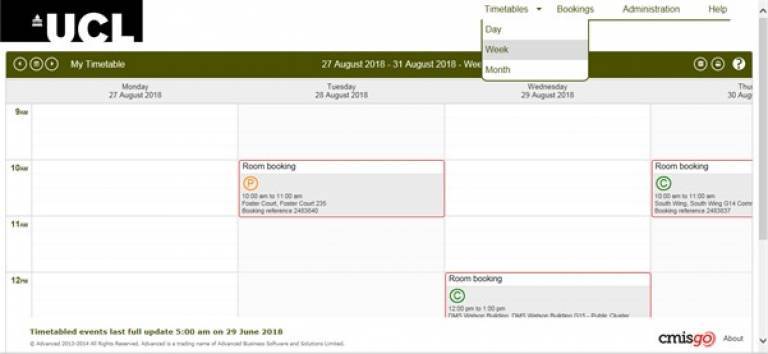
From this screen, you will be able to get an overview of your existing booking in ‘my timetable’. The timetable’s view can be configured to show your scheduled bookings per day, week or month.

You can use the back and forward arrows to move in time or use the ‘Go to date’ button
Find and book
To search for room availability, click on the booking tab on the top left corner of the page and select ‘find and book’.

This will open the below window. From this page, follow the 6 steps to your booking confirmation.
Step 1: Where
Select your preferences: Campus, building or site, the type of space you require (classroom, lecture theatre, public cluster etc.). The number of attendees field is mandatory and will need to be filled in.
Note: Only complete Campus, Building, Site or the type of space if they are essential to your booking. Being too restrictive will limit the available rooms returned.

One you have entered your search criteria, click on the ‘Next’ button to proceed.

Step 2: When
From this screen, select your start and end time and the date required.

Step 3: Select a room
You are now presented with a list of available rooms matching your search criteria (step 1&2).
Click on the + button to view additional room details

A pop up window will give you information on the type of booking associated with the room.

You can view the previous or next room by clicking on the ‘Previous’ and ‘next’ button.
Once you have selected your preferred room, click on the ‘Close’ button to go back to the ‘select room screen’.
Click in the row of your choice to select a room. The row is highlighted in a darker shade of grey.
Click on the ‘Next’ button to proceed.

Step 4: Add contacts
The contact selected field is automatically populated from the user ID used to log in.
You have the option to associate a contact to this booking by typing their name and surname in the name field.
This will trigger an email and create an event in their timetable.
NB: This does not replace a standard outlook calendar invitation to an event/meeting.
Click on the ‘Next’ button to proceed.

Step 5: Additional information
To complete your booking you will need to populate the External Speaker field if there is an external speaker.
If there is no external speaker, please add n/a.
Bookings with an external speaker will need additional approval by the room booking team and may take longer to approve.
Click on the ‘Next’ button to proceed.

Step 6: Book
This is the final step to your booking. To proceed you will need to add a booking note in the ‘booking notes’ field.
The booking notes should be the title of your event.
This screen also gives you a booking request summary based on the criteria entered in the previous steps.
If you are satisfied with the information displayed on this page, click on the ‘Book’ button to proceed.

Step 7 Booking confirmation
You have successfully made a booking! A booking reference is automatically generated.

Looking for a specific room or building?
Alternatively, you can check availability and book a room in a specific building or room. Click on the booking tab on the top left corner of the page and select the ‘check availability and book’

This will open the below window. From this page, follow the 6 steps to your booking confirmation.
Step 1: Where
In the ‘Room’ field, start typing the name of the building or room you wish to make a booking for.

Once you have selected the room you wish to book, fill in the number of attendees and click on the ‘Next’ button to proceed.

Step 2: When
Select the date(s) you wish to make your booking for.
You can check availability for this room for multiple dates. The selected dates will appear in the ‘Selected dates’ field.
From this page, you can delete any lines by clicking on the ‘bin’ icon.
Once you have selected the date required, click on the ‘Next’ button to proceed.
NB: Only click on the date once, a double click would add 2 lines under the selected dates field.

Step 3: Select times
This will take you to the ‘Select times’ screen.
Available slots are displayed in yellow
Busy slots are displayed in red

Click on the desired time slots. This will now be highlighted in green.
Once you have selected the times required, click on the ‘Next’ button to proceed.

Step 4: Add contacts
The contact selected field is automatically populated from the user ID used to log in.
You have the option to associate a contact to this booking by typing their name and surname in the name field.
This will trigger an email and create an event in their timetable.
NB: This does not replace a standard outlook calendar invitation to an event/meeting.
Click on the ‘Next’ button to proceed.

Step 5: Additional info
To complete your booking you will need to add the name of a ‘Speaker’.
This can be yourself, or the person you might be booking the room on behalf or, the chair of the meeting, lecturer etc…
Click on the ‘Next’ button to proceed.

Step 6: Book
This is the final step to your booking. To proceed you will need to add a booking note in the ‘booking notes’ field.
The booking notes should be the title of your event.
This screen also gives you a booking request summary based on the criteria entered in the previous steps. In this example, you are making 3 bookings for the same room.
If you are satisfied with the information displayed on this page, click the ‘Book’ button to proceed.

Step 7 Booking confirmation
You have successfully made a booking! A booking reference is automatically generated.

My bookings
The booking automatically appears in the ‘My booking’ page.

Depending on the type of booking, provisional or confirmed, the content of the email will differ.


Manage bookings
To retrieve your booking, click on the ‘Bookings’ tab and select ‘My bookings’

This will display all your existing bookings
From this page you can manage your bookings. Select your booking by ticking the box on the left of your booking.

Cancel bookings
Once selected, you can cancel your booking by clicking on the ‘Cancel’ button at the bottom of the page.


Please note: bookings cannot be amended. If you need to modify your booking, cancel and re-book it through the ‘Find & Search’ process demonstrated above.
NB: to view a full list of your bookings (past and future) tick the ‘include bookings from the past’ box.

Help & support
You can find more help on how to use CMIS Go by clicking on the ‘Help’ tab on the top right corner of the page.

