UCL's VLE is based on Moodle and you can add video or audio files directly through the Moodle 'Media Resource' through the Activity Resource tool.
We recommend that UCL media content that is specifically linked to a taught module is uploaded to Moodle through the Lecturecast upload process, for information on how to do this, please go to the Lecturecast help pages
However, in Moodle you can add media content via the Moodle Media Resource, it is advisable to only use this if you need to share your video or audio files to a wider audience through the web or if you wish to embed the content in say a UCL web page or similar, and especially if that audience is external to UCL. Users wanting to add content to UCL Xtend should contact the Mediacentral team for further information
Instructors - A quick guide to help you add content to your Moodle course
Before adding any media through Moodle please login to Mediacentral first https://mediacentral.ucl.ac.uk then when adding your media through the Moodle Media Resource you will be asked 'Have you used Mediacentral before', please answer 'Yes'.
- This way any media uploaded through the Moodle Media Resource becomes available to share to a wider audience from the Mediacentral portal, if you so require.
- For users who initially answered 'No' please contact the team who will explain the process to make your Moodle content available to a wider audience
Instructor adding content to Moodle course
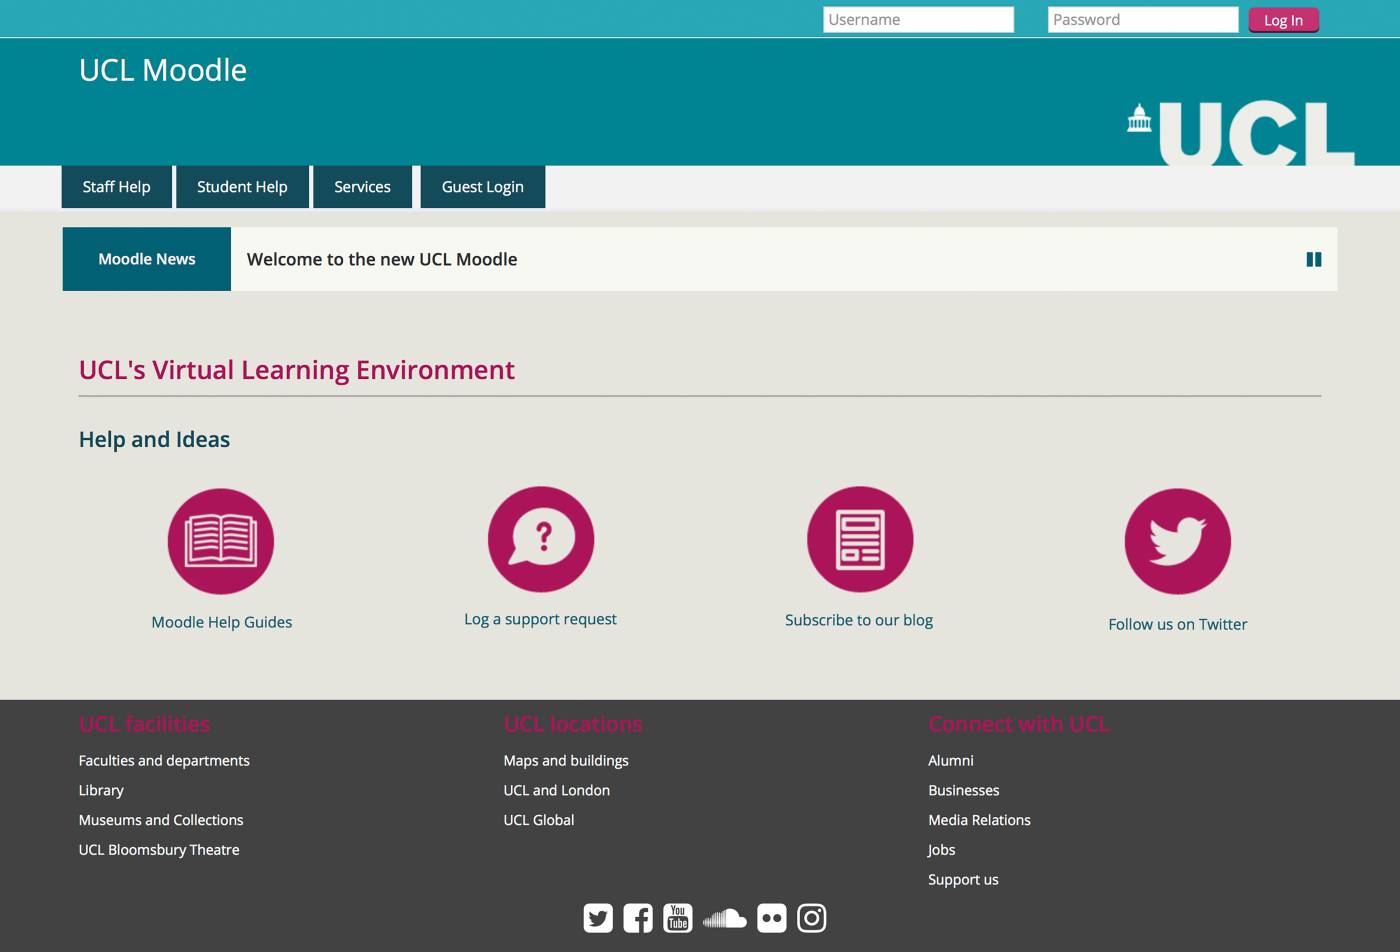
1. Log on as Instructor to Moodle at https://moodle.ucl.ac.uk
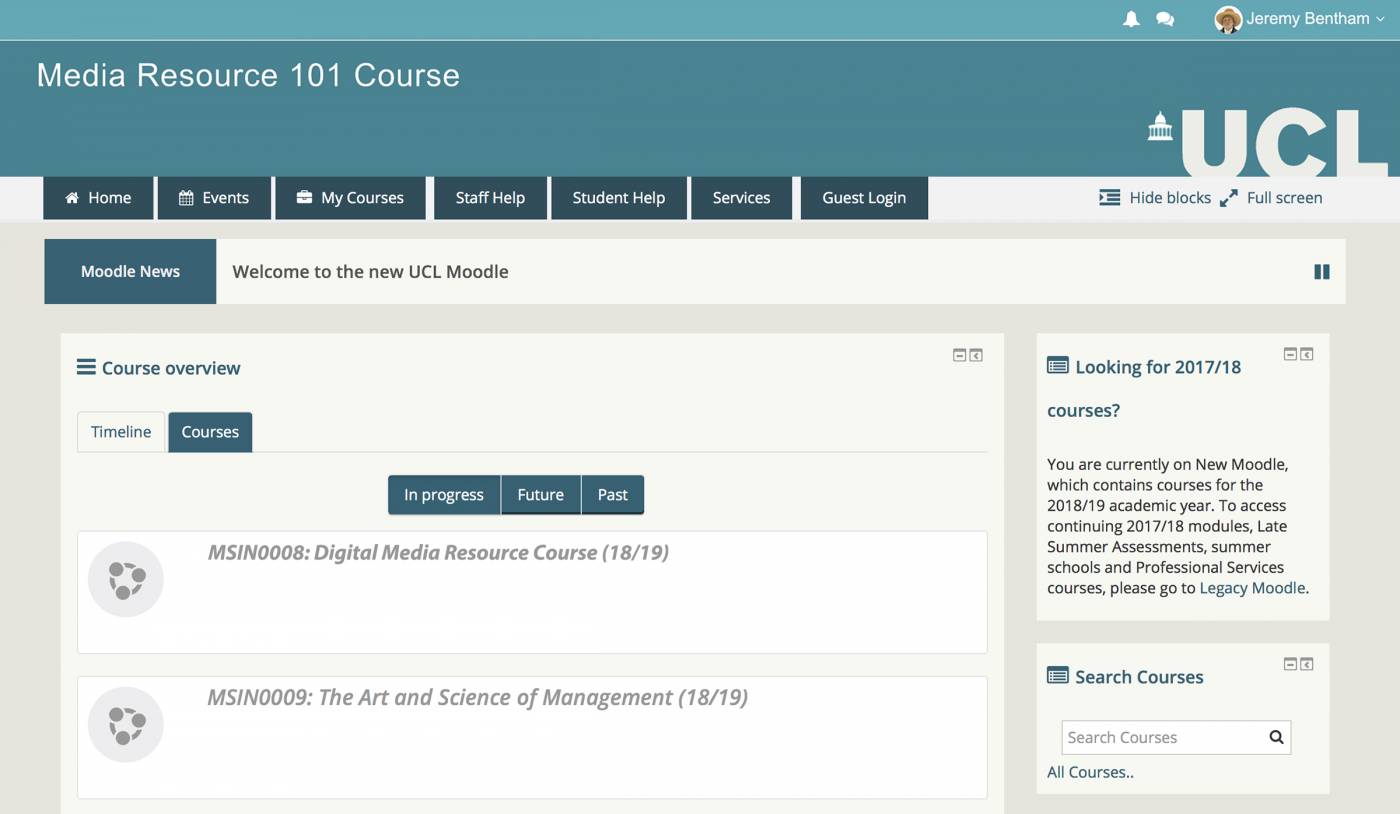
2. Navigate and choose the course you are adding content to.
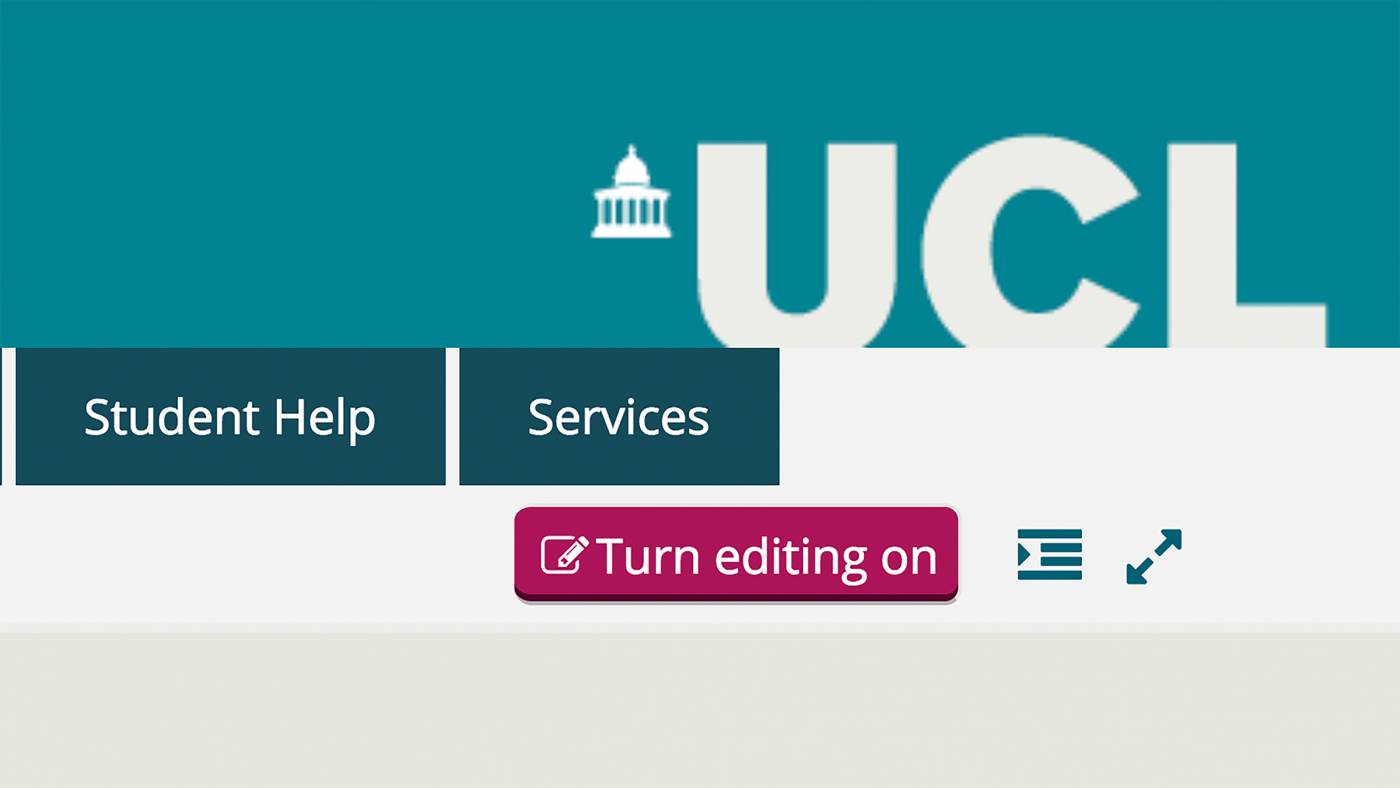
3. Turn Editing On
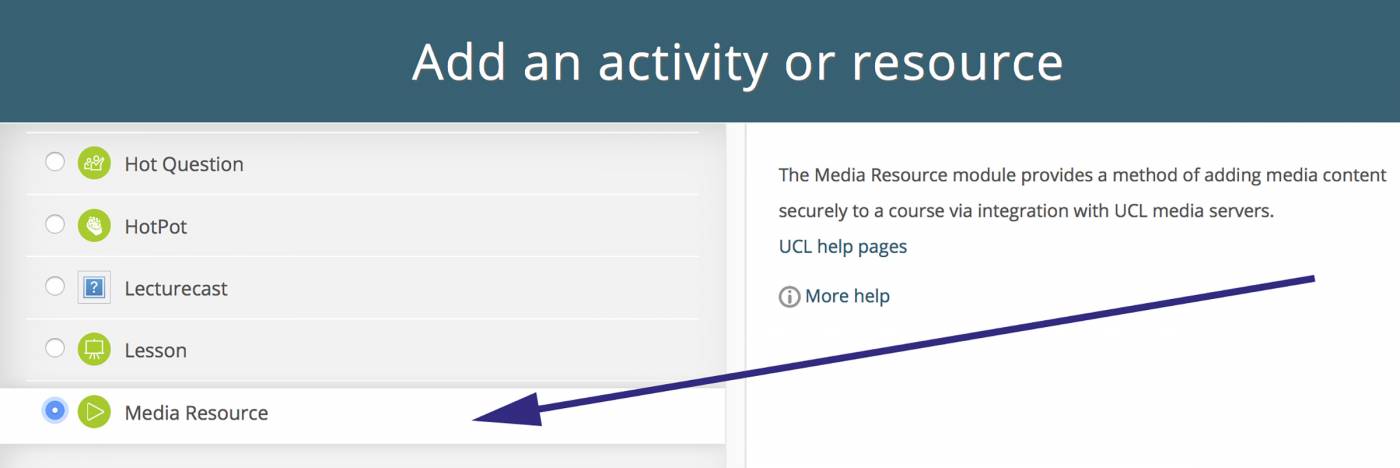
4. Click to Add Activity or Resource
5. Select Media Resource from the list by highlighting the radio button
6. Click on the Add button
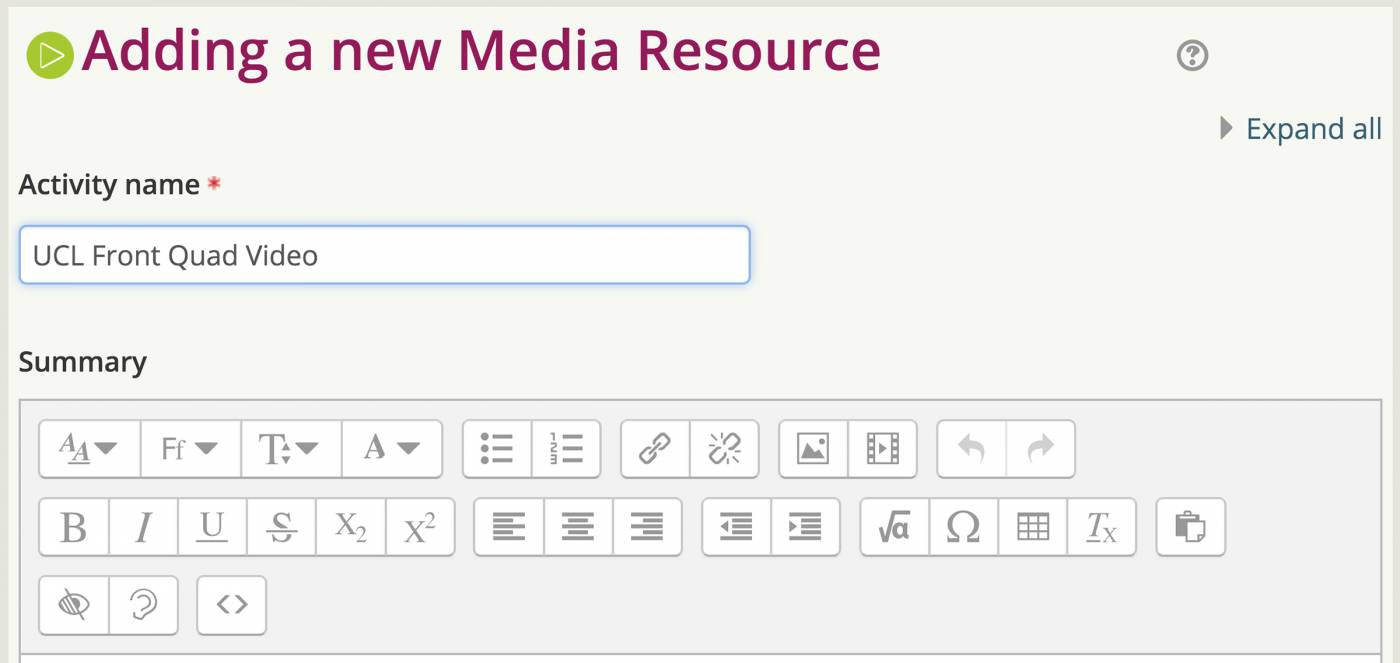
7. Type in the Activity Information
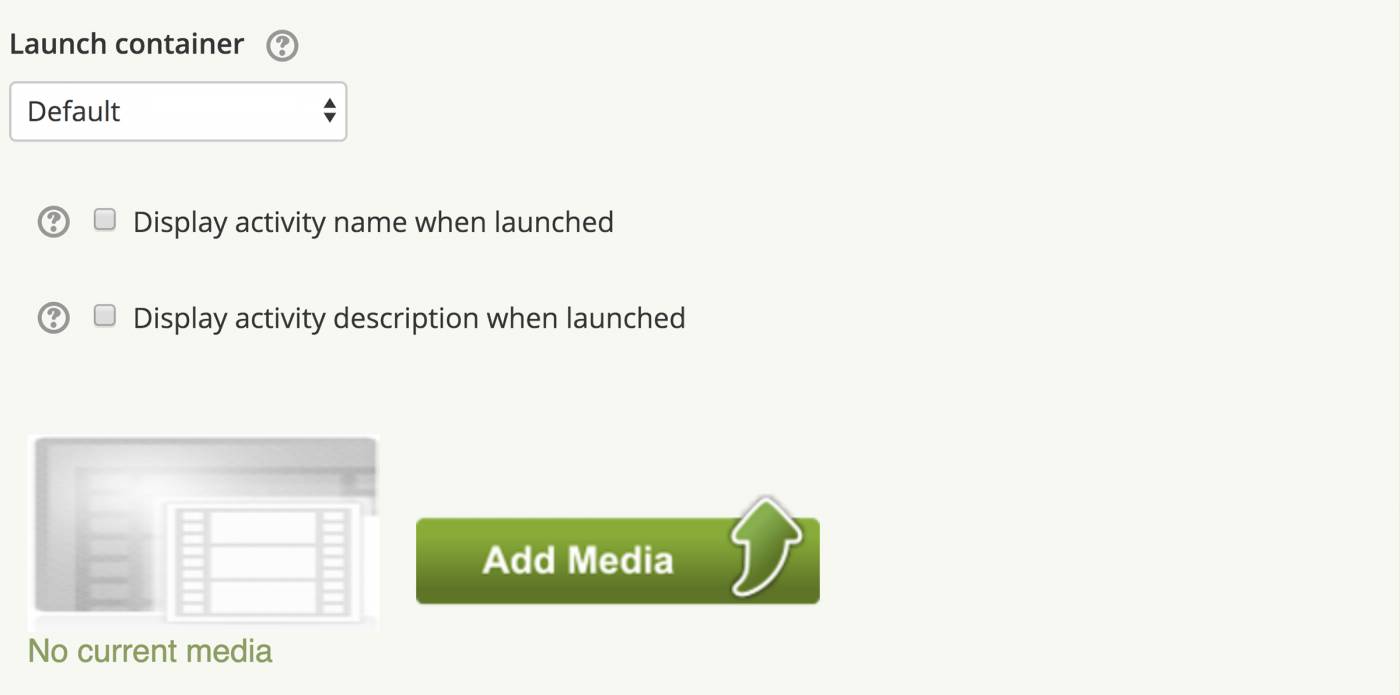
8. If you have new content click: Add Media
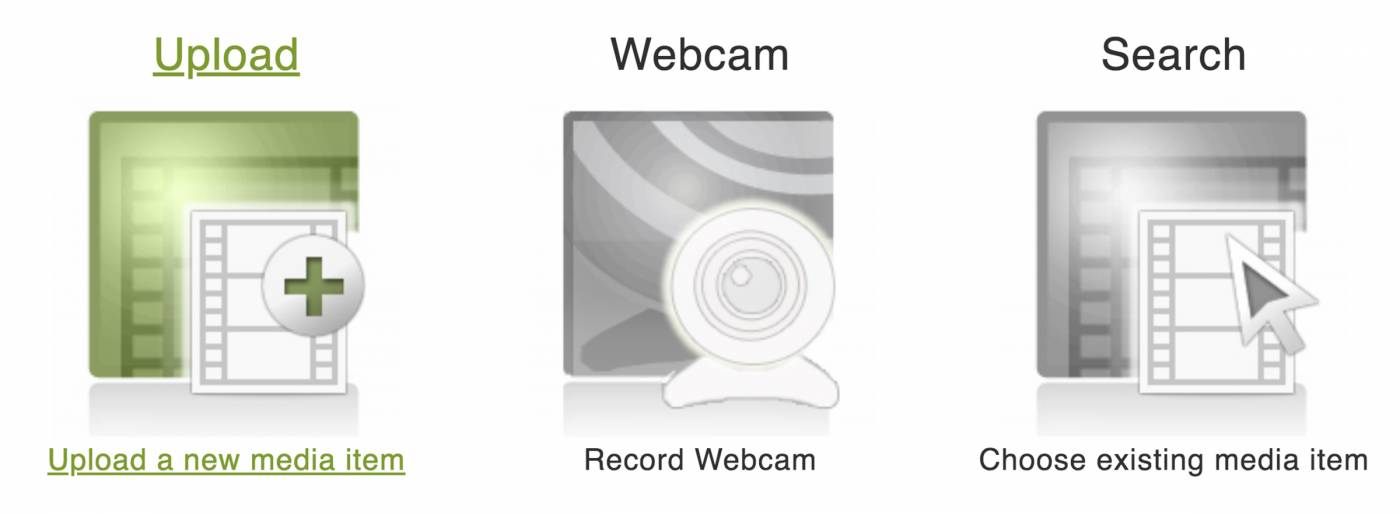
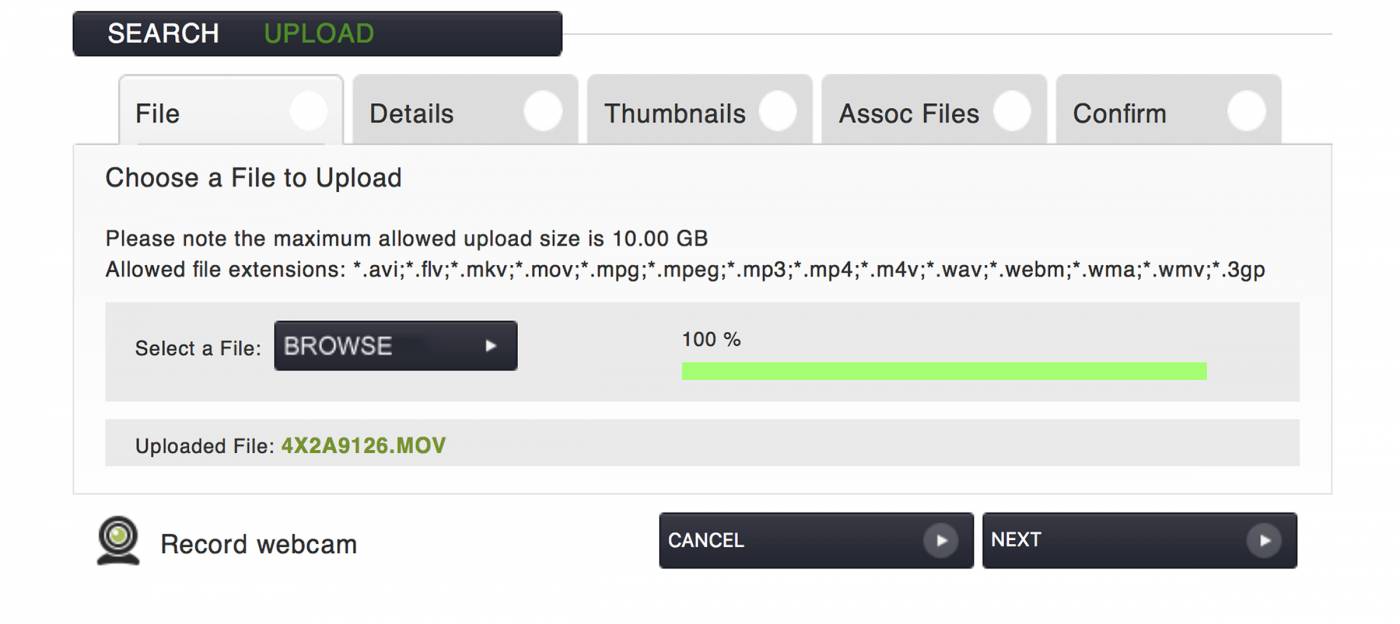
9. Click on Upload to add a new media item
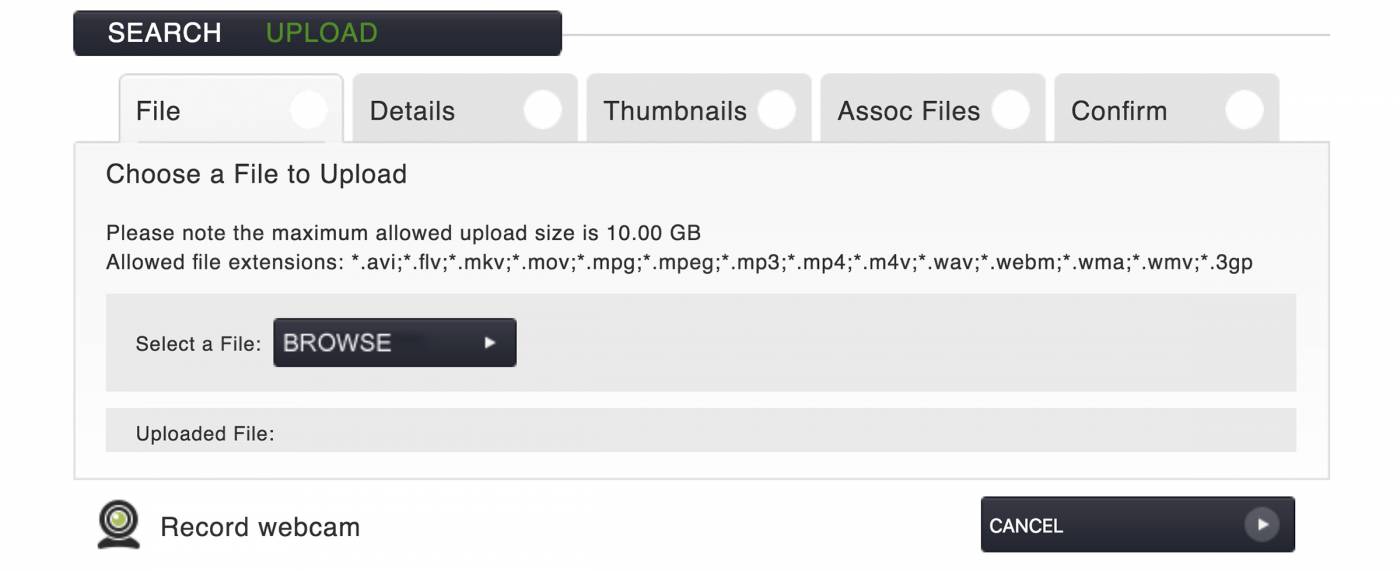
10. At this point you can choose a file on your device or search for a previously uploaded file. For new files ensure your file is one of the approved file types which currently are: .avi, .flv, .mkv, .mov, .mpg, .mpeg, .mp3, .mp4, .wav, .webm, .wma, .3gp.
11. Your video will now upload to the Media Resource server.
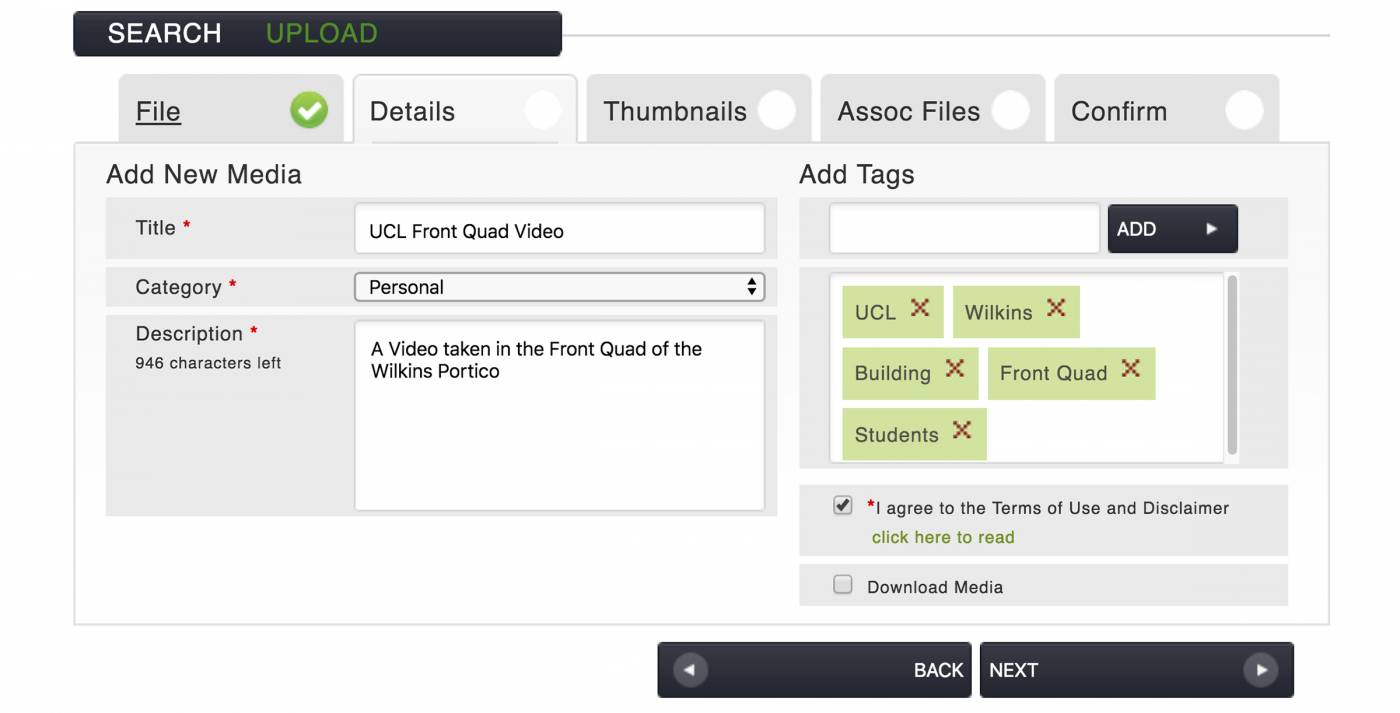
12. Add details to all the boxes, the more information in the description and Tag boxes you can add the better, as this allows your content to be found when searching. You also have the option to allow students to download the file, perhaps add this option if the file is very large, this allows students (and staff) to download via the UCL network and watch at their leisure offline without worrying about data download limits.
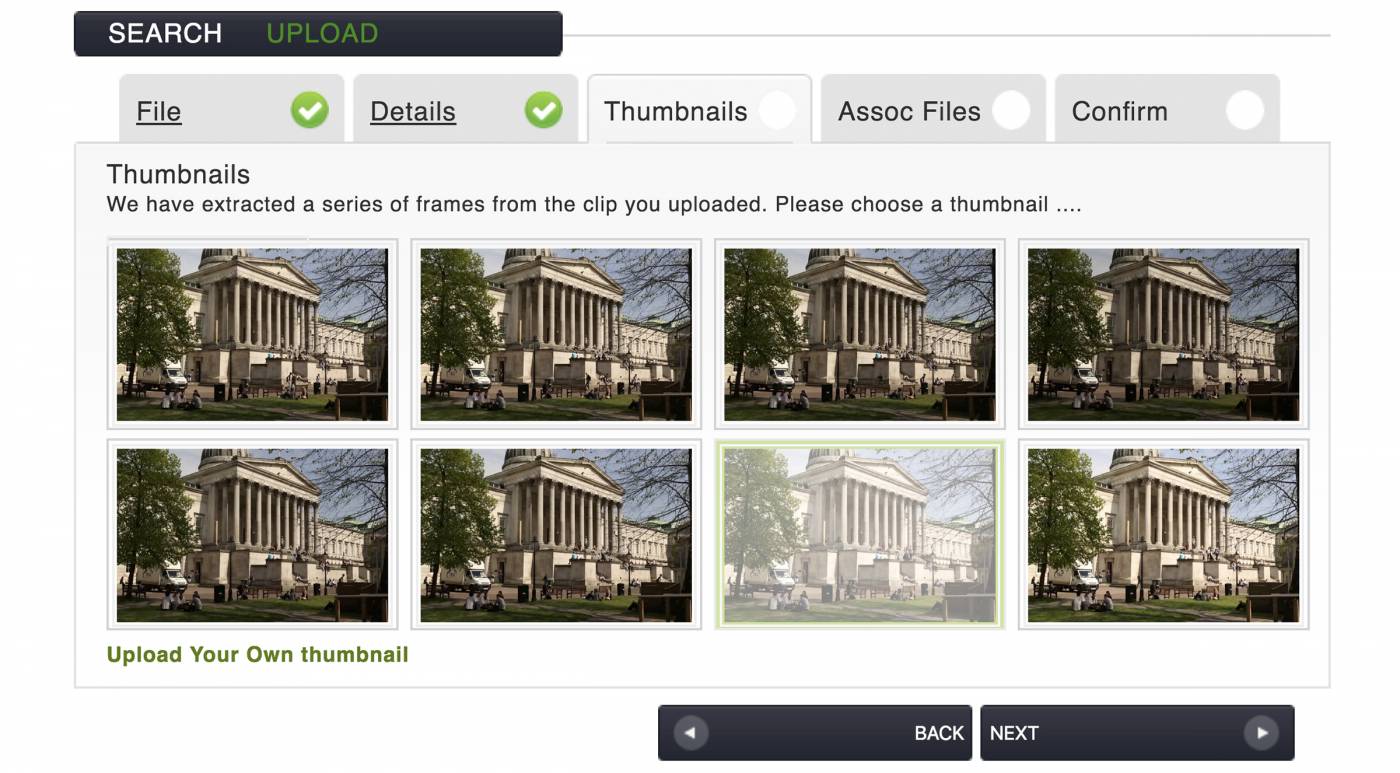
13. The next step is to choose a thumbnail image. This will show as a still image, you can upload a file if the frames chosen do not visually describe your video.
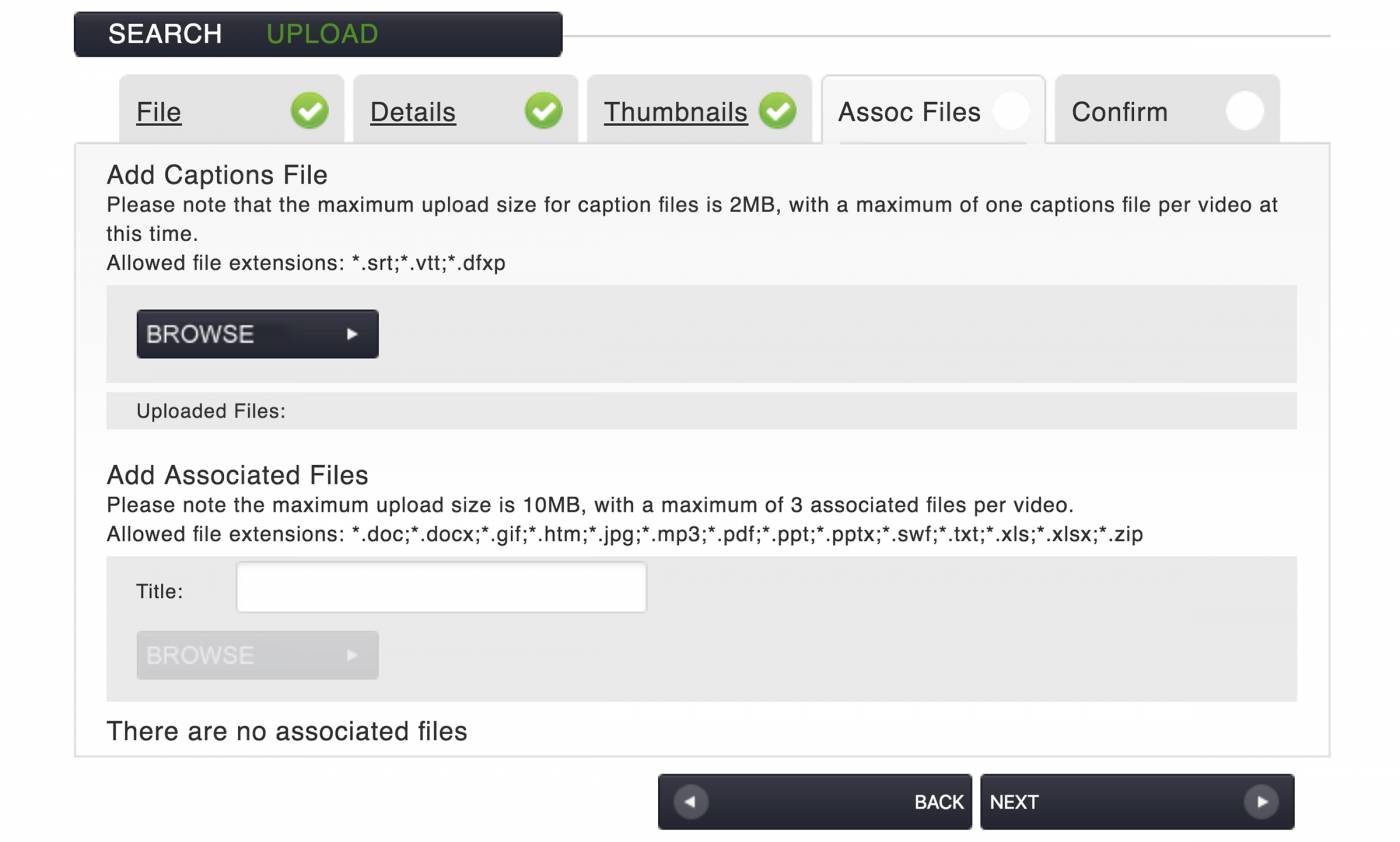
14. You can upload files you wish to associate with the video/audio file as long as they are in one of the following formats: .doc, .docx, .gif, .jpg, .mp3, .pdf, .ppt, .pptx. .swf, .xls, .xlsx or .zip and you can also add a caption file in the recommended format, either: .srt. .vtt or .dfxp.
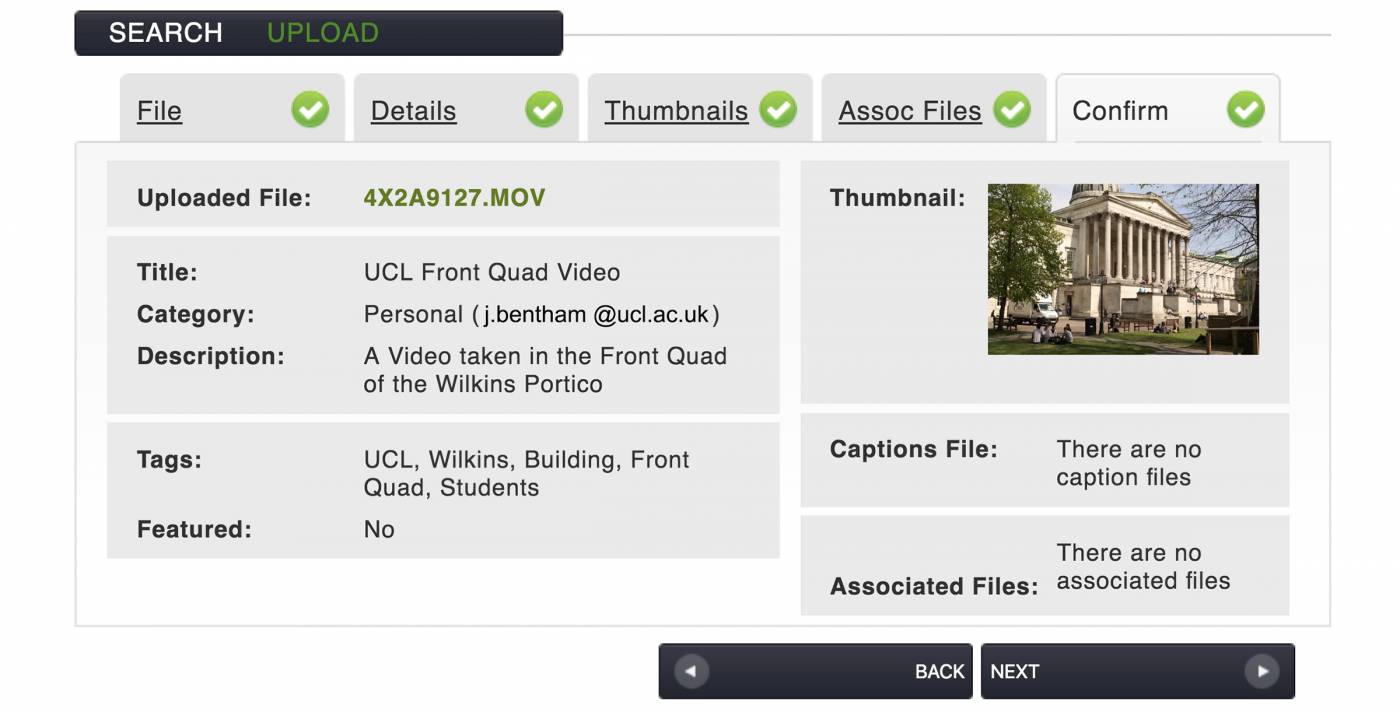
15. Now you can see the data and description details you have attached to the file, if required you can use the back button to amend these.
16. The video has now been sent for encoding. Please accept that this may take some time as all content is placed in a queue. You will receive an email when your video has finished processing and is available for viewing.
17. Click Save to add item
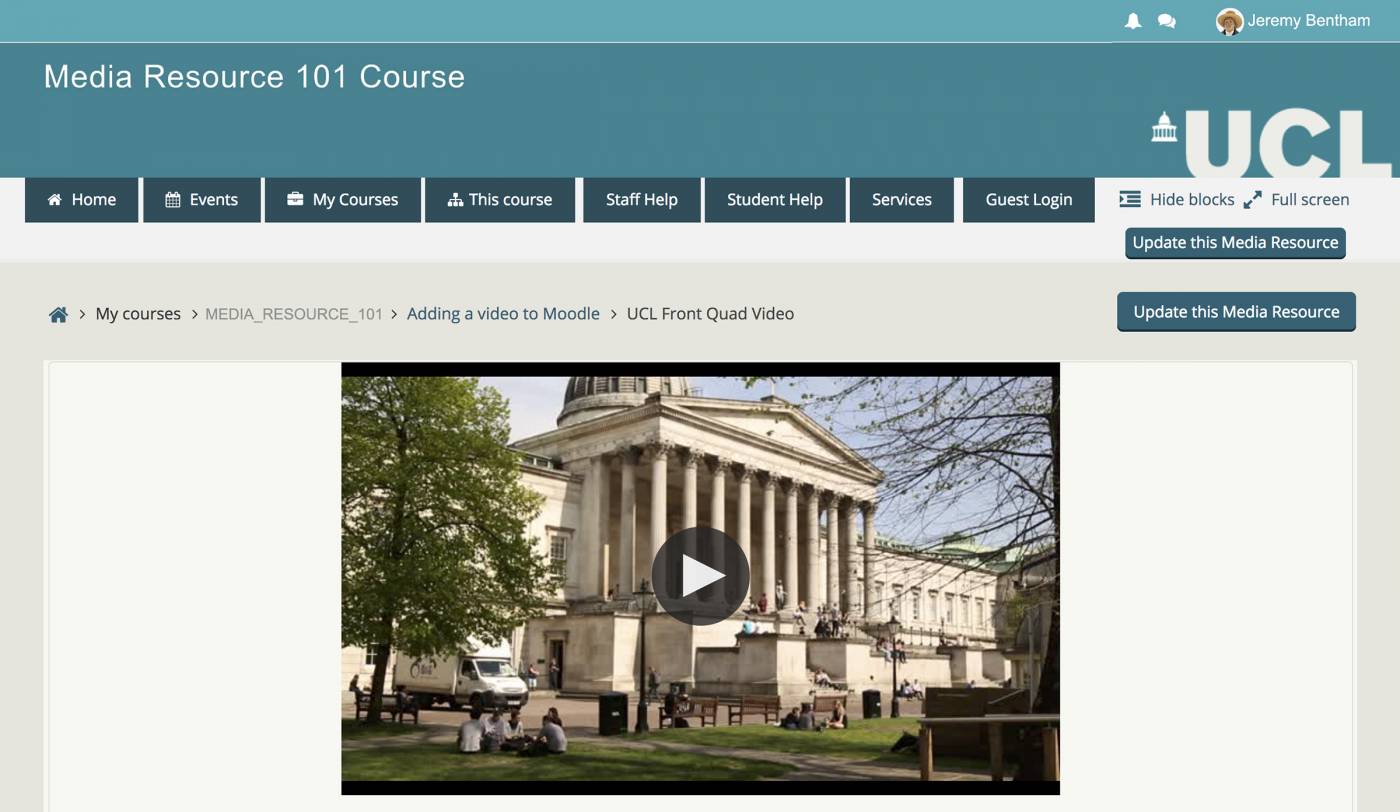
18. The video, once processed will now play through the course page
Student View
Your students will be able to view the content only after it has been encoded. Once the file is processed you will get an email to say the content is ready to view. You can then let your students know the content is available through Moodle.
Student Upload
We are not at the point of being able to offer a student upload facility through Moodle. However, we recognise that this is a priority requirement and the ISD Mediacentral team will develop and deliver this as soon as possible.
If there is a requirement for students to submit media content to a Moodle course or module, then as a 'work-around' they should follow the instructions 'Share your video with colleagues or your students' on the Mediacentral Share webpage.
FAQ's when using the Moodle Media Resource
Q. Do I use the Mediacentral portal or Moodle to upload and view my videos?
If you wish to share your video with the world, then adding the content directly through the Mediacentral portal is the best method, however, if you just want students on a particular module to view the content then you can use the use Moodle Media Resource or if the content is specifically media to teaching, then we recommend uploading to Lecturecast as the preferred option, please see this link for further information.
Q. Can I upload multiple files?
If you have a significant number of video or audio files that you wish to add to Mediacentral or your Moodle course, please contact the UCL Mediacentral team for further help and information.
Q. What media file formats can I upload?
When uploading media files, please check your media is one of the approved file types. These currently are: .avi, .flv, .mkv, .mov, .mpg, .mpeg, .mp3, .mp4, .wav, .webm, .wma, .3gp.
Q. Who do I contact for further information?
Q. How can I choose my own thumbnail image?
During the upload process, it is possible to choose your own thumbnail image. This can be an image that better reflects your media content, instead of the thumbnails that are automatically generated by the system.
When uploading and you arrive at or select the section marked 'Thumbnails', next choose the button marked 'Browse'. This will then take you to a file chooser where you can select the image of your choice. Once selected, this will become the new thumbnail image.
It is recommended that the image you choose has:
- a JPG or PNG image file format
- a minimum image size of 640 x 360 - (Width x Height)
- with a maximum file size of 1 MB
Q. How long will my file take to upload?
The time it takes to upload a file depends on your internet connectivity and the size of your file. Try to ensure your computer does not go to sleep during upload and ensure that your connectivity is unbroken. Once uploaded your file joins a queue for encoding and sometimes this may take time to process - you should always allow 8 hours to guarantee your file has been fully processed and available. In busy periods it may take longer.
Q. Processing time - my file is still not available?
Unfortunately, we do not have the same processing power as YouTube and all files go into a queue - it's 'first come, first served', please be patient.
Q. Why can't I see the content I've previously uploaded into Mediacentral?
Mediacentral is the interface for publicly available content and although all media sits on the same servers, the security and access for Moodle content is kept separate for obvious academic reasons. You can however see a list of your content in the admin console. Click on the icon in the top right of the page and then on 'My Content'.
Q. Unsuccessful uploads - what happens, what do I do etc.?
If your file fails to upload you will receive an email letting you know there is an issue. The support team also receives this and will look to ascertain if the problem is a system error or a problem with the file. Normally the issue is due to poor connectivity on upload, UCL's infrastructure is more stable than a home connection, so if you are at home and have a large file, try to connect via an ethernet connection. It is generally best practice to upload whilst on campus.
Also, check that the format of the file you have uploaded is on the list of approved filetypes and is under 5Gb in size.
Q. My Media has failed to load or play?
On rare occasions your media may not play, the main reason is normally that your browser probably requires updating, or is set to play via Adobe Flash, this tool has now been removed from the majority of browsers. All content in Mediacentral is set to play in HTML5, note Adobe Flash will no longer be available from 2021.
A quick way to check when there is a problem is to view your content on an Apple iOS or Android device. If the content plays, then the issue is with the browser you are using on your PC / Mac.
If your content will not play using Desktop@UCL then please contact the Mediacentral team.
Q. Editing, is this possible?
Editing of your video content is now possible using the Trim, Chop, and Export function in Mediacentral further information is on the general upload pages of the website, if your project is more substantial please contact the UCL Educational Media team.
Q. Can I upload & view from mobile devices?
Yes, this is possible, but generally not advisable if you are on the move. Try to do this where you have good access to WiFi rather than using your data allowance. To view login to UCL Moodle as you would do normally.
Q. Can I update a media resource added by another tutor?
Yes, you can do this. However, only do this if you have a good reason to and you also have equal authentication rights as an instructor in Moodle.
Q. How does a student upload media?
Moodle has been updated and this feature will be implemented as soon as possible. If as a student you currently wish to add a video or audio file to your UCL Moodle module then use the UCL Mediacentral portal. Follow the process to upload as described here and make the content Personal(Public) to you. It is possible then to share or embed the content but your video will not show up in the portal.
Once your file is available, always use the UCL Mediacentral Share link to add to Moodle.
Q. How do I delete media I no longer require?
If you wish to delete any media assets uploaded using the Moodle "Media Resource", then for help please contact the Mediacentral support team.
 Close
Close


