CNS (refinement)
CNS (Crystallography and NMR System) is a suite of programs designed for crystallography and NMR. It represents a collaborative project across a number of universities, and is headed up by Axel Brunger (Yale). It used to be called XPLOR, and the latest version (1.2) can be found here.
CNS operates using scripts that instruct the underlying program (CNSsolve) to perform various functions. The easiest way to use the system is to download a script from the website "Input Files" page. You then need to edit the script file in order to give it the specifics of your data, and then run CNSsolve telling it to read in the edited script file. The easiest way of running a job is to make a file called cns.com in nedit, and then paste in the following lines:
#!/bin/tcsh
cns_solve <myjob.inp> myjob.log
Obviously you will want to change "myjob" to the name of the script file you are using (e.g. refine.inp). It is also helpful to output the log to a separate file in this case called myjob.log.
Once you have made the file cns.com you need to make it an executable file by typing:
chmod +x cns.com
Preparing input files
1) Reflection file: CNS cannot read the ccp4 formatted mtz files so before you try any refinement you first need to delete the extra ccp4 columns, rename the remaining columns and then convert the file to the appropriate "CNS" (Xplor) format. Instructions can be found here.
2) Preparing the pdb file: CNS uses a different column format to identify chains so you first need to change your pdb file into the correct format. To do this run the program "pdbset" and then label the chains in your model as follows:
setccp4
pdbset xyzin mypdbfile.pdb xyzout pdbfile4cns.pdb
chain A A <enter>
chain B B <enter> ....etc. for all your chains
end
In order to make the final pdb file, and to generate the "molecular topology file" that CNS uses for defining restraints you now need to run the program generate.inp.
To make generate.inp, go to the CNS website, navigate to the Input files section and select "generate.inp" from the general section. Click on "Edit + help". The critical box to fill in is the "protein coordinate file" (your pdb filename). Then save this file to your working directory, and run it using the cns.com file which you will need to change to:
#!/bin/tcsh
cns_solve <generate.inp> generate.log
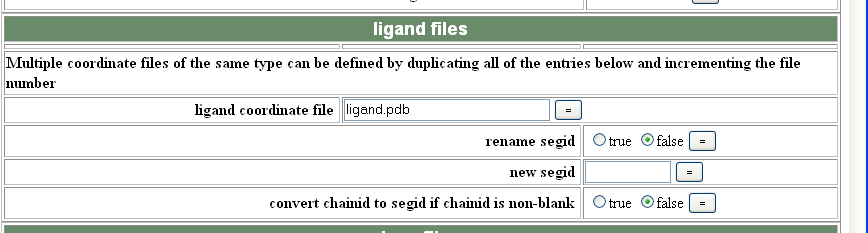
If you have ligand in your structure you can also use generate.inp to incorporate the ligand library into the mtf file. To do this you need to generate and then save a CNS topology (.top) and a parameters (.par or .param) file using the PRODRG2 server (instructions here). You then need to give CNS the pdb file for your ligand as a separate pdb file AFTER you have build it into your density, and also tell generate.inp where to find your .top and .par files eg:
and then:

In future CNS runs your ligand will be incorporated into you pdb file, but you will ALWAYS need to tell CNS to look for your .top and .par files.
It is almost always a wise idea to have a look at your generate.log file (using a text editor) to make sure it has not rejected anything you have built. For common error messages see the "Problem solving" section below.
Refinement
NB You HAVE to re-run generate.inp each time you make changes to your protein coordinates.
Unlike both CCP4 and SHELX, CNS allows you to tailor your refinement quite carefully to your problem. Thus it is an excellent program to deal with problematic refinements as there are almost an infinite number of variables you can change. You can also choose to run just rigid body refinement (rigid.inp), simulated annealing (anneal.inp), gradient minimization (minimize.inp), group Bfactor refinement (bgroup.inp) or individual bfactor refinement (bindividual.inp). You can also generate maps using model_map.inp. Alternatively you can run many of these jobs together using refine.inp. In the following example I will describe how to set up refine.inp, however the same principles apply to the other programs. Check out the refinement section of the tutorial on the CNS website for more details about how the different programs work.
ncs
If you want to use ncs symmetry you need to generate a "ncs.def" file. To do this choose ncs.def from the CNS website, and scroll down to the "restraints" section. You can then add your ncs groups by either using segment id (segid A) or more explicitly using residue numbers (segid A and resid 1:100). Set the weighting to 500 (very strong NCS) if you are just starting your refinement, and then reduce it in steps of 100 as you do future rounds of refinement (this requires a bit of trial and error to see what weights work best). Unlike the other CNS programs, you can save ncs.def directly to your working directory and then just tell the refinement job where to find it.
refine.inp
refine.inp carries out simulated annealing, energy minimization, B factor refinement and map generation automatically. You need to have run generate.inp prior to refine.inp, and again each time AFTER you have model-built or made any changes to your protein. Open the refine.inp page on the CNS website and then enter your molecular topology file (generate.mtf), the location of any ligand .top or .par files you are using, your space and cell group information, resolution cut-offs and ncs.def if you need to use ncs. You can then specifically edit each of the refinement modules:

With simulated annealing you normally want to run "slowcool" and can increase or decrease the amount of movement to allow using the starting temperature (I usually use 5000 initially and then decrease to 2000 to hone in on the solution). The drop in temperature per step and number of steps can also sometimes make a difference.
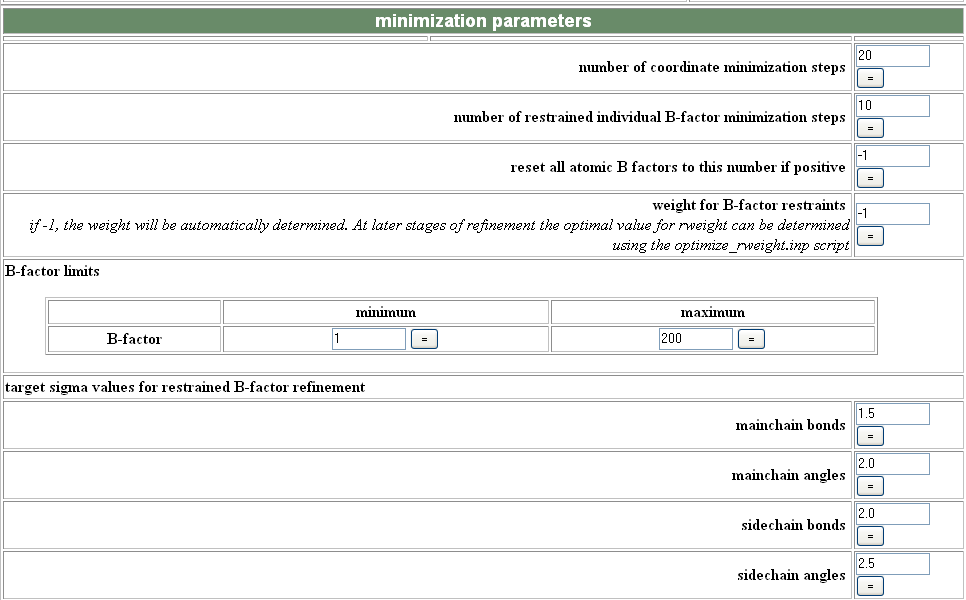
In the minimize/Bfactor module, increasing the number of steps can sometimes help the refinement converge more completely.
Once you have set up all the parameters you must save refine.inp to your working directory before running it using and edited cns.com:
#!/bin/tcsh
cns_solve <refine.inp> refine.log
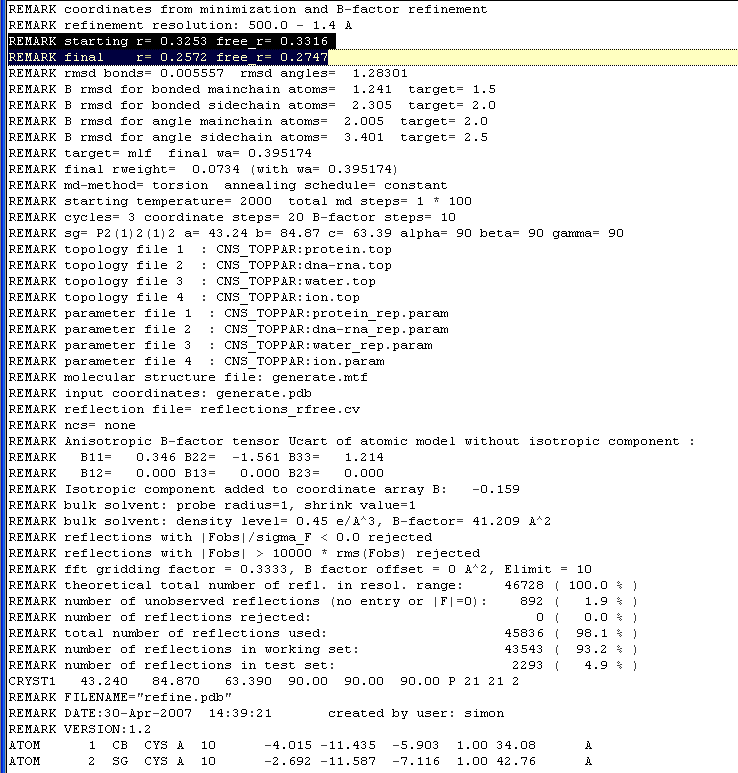
The program will output a pdb file with your R factors and a number of other statistics listed at the top of the file:
refine.inp will also give you a sigmaa weighted 2Fo-Fc and difference maps that can be converted to ccp4 format using the following commands in the usf mapman program:
usf mapman (to open the program)
re m1 refine_2fofc.map cns
re m2 refine_fofc.map cns
no m1
no m2
wr m1 2Fo-Fc.map ccp4
wr m2 Fo-Fc.map ccp4
quit
NB For a difficult refinement case you will probably not want to run refine.inp, but rather perform separate refinement protocols using the individual programs such as anneal.inp, bgroup.inp etc.
Problem Solving
Once you have made your .inp files from the website it is often much easier just to edit them using a text editor. Thus to edit your refine.inp file just type:
nedit refine.inp
which will give you something that looks like this:
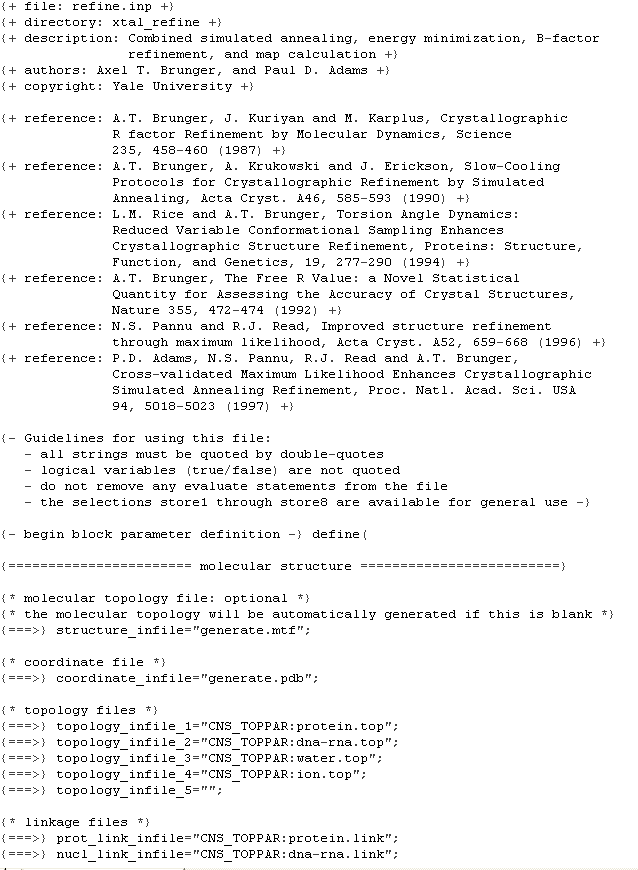
The file is fairly self-explanatory and even tells you the different options available for each section. Almost everything you need to change is in the first fifth of the file, followed by a helpful comment:
{ things below this line do not normally need to be changed }
Errors
Unfortunately CNS is famous for complaining, so when your job falls over check the end of your .log file (eg nedit refine.log). The following are some solutions to common error messages: