PyMOL
PyMOL is a great program for looking at molecular structures and making publication quality pictures or movies. You can download an evaluation copy from the DeLano Scientific website which is very easy to install on a windows based machine. Additional help can be found using the manual, wiki and FAQ on the PyMOL website.
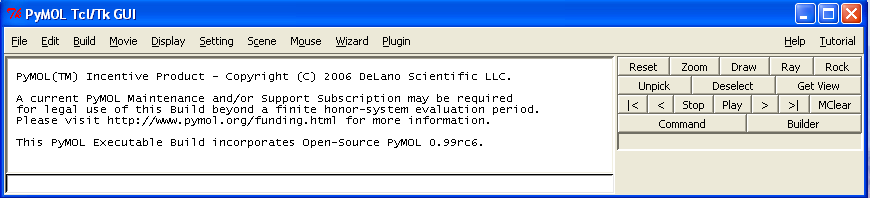
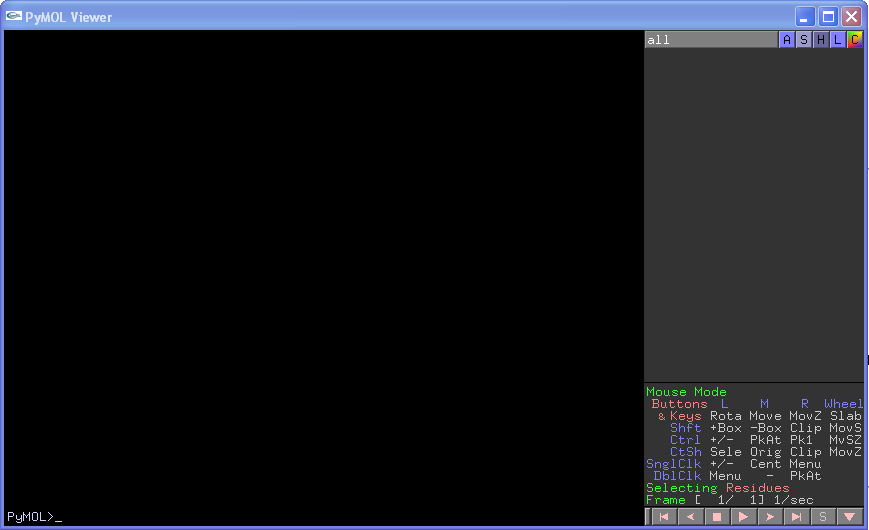
Once installed you can start PyMOL by double clicking on the icon (in MS Windows) or by typing pymol at the command prompt in Linux. This will give you two windows called the "PyMOL Tcl/Tk GUI" and the "PyMOL Viewer":
PyMOL Tcl/Tk GUI
PyMOL Viewer
Although PyMOL can be run entirely from scripts, the presence of this GUI places PyMOL head and shoulders above previous picture-making programs such as Molscript or Bobscript. Pretty much everything you will ever want to do in PyMOL can be done using the mouse, however to get that extra bit of flexibility the GUI includes command prompts in the Tcl/Tk window (best one to use as you can see the history and error messages) and at the bottom of the viewer window. In addition you can download all sorts of extra scripts and plug ins written by other people.
Mousing
There are a number of different mouse modes that can be used in PyMOL. Most of the time the default (3-button Viewing) will be fine for moving around your molecule. If you do not have a three-button mouse with a wheel you can select 2 or 1 button viewing mode from the Mouse drop-down menu in the Tcl/Tk window. The different functions (including key/mouse combinations) are shown in the bottom right of the Viewer window (where it says "Mouse Mode"). Generally, in viewing mode, left click allows you to rotate the molecule, middle click allows a translation, right click a zoom, and the wheel slabs. Selecting atoms and/or residues can be achieved directly by left clicking on an atom, or more judiciously by right clicking on an atom and then choosing what you want to select (NB any selections made this way are automatically incorporated into your currently selected group).
Editing mouse mode can be used to physically move atoms in space, however as PyMOL is not a modeling program I would only recommend doing this if you are trying to make a hypothetical model.
Viewing a structure
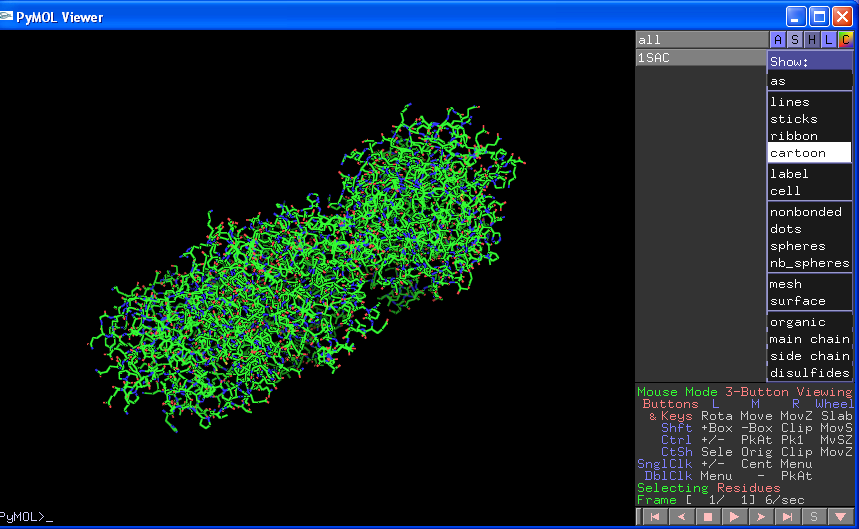
To open a pdb file simply load it using File->Open in the Tcl/Tk window. The name of the pdb file will appear in the right of the viewer window under the word all. Next to the file name are three boxes. A stands for Actions, S for Show, H for Hide, L for Labels and C for Colour. Every time you load a new object or make a selection you can change the properties of that object by clicking on these boxes and then selecting options from the subsequent drop down menus:
Obviously the ASHLC boxes next to the "all" will change properties across all items. You can also individually turn items on or off by clicking on the names which will turn dark grey/black when not selected.
Perhaps the easiest boxes to start with are the show (S) and hide (H) boxes. These are generally self explanatory and will lead to immediate changes in the viewer window. Note however when you choose "cartoon" the representation only shows protein atoms (ligands/waters/sugars etc. disappear), and when you select "surface" the surface of all atoms is shown (INCLUDING waters/ligands etc.). You can adjust the global properties of the various views by selecting Settings->Edit All which will give you the following box:
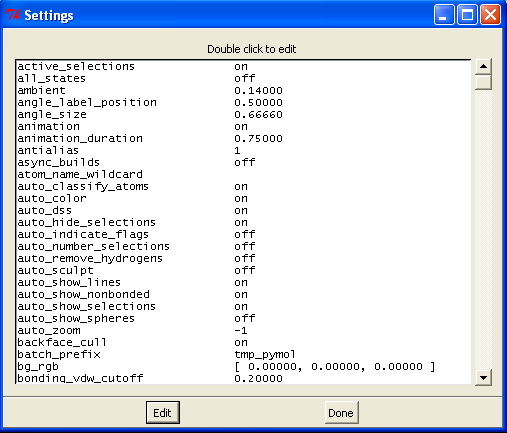
Scrolling down this list will give various options that can be edited. Alternatively you can type the commands directly at the prompt if you know what you are after (a list can be found here).
The Colours (C) box is again fairly self-explanatory and allows you to colour by element, chain, secondary structure etc.
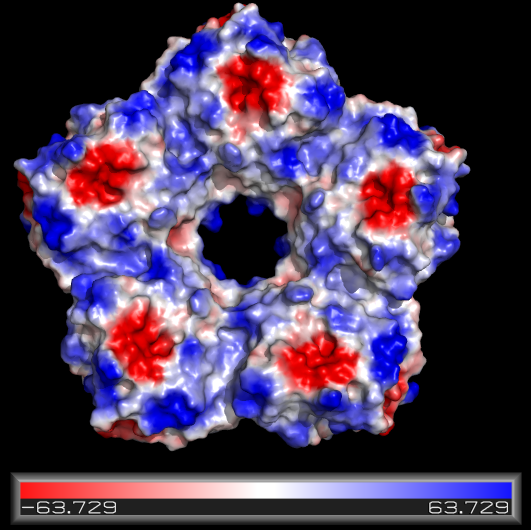
The Actions (A) box has a lot of useful functions that are generally self-explanatory. There are some additional (and very cool) functions worth having a look at in the "presets" menu, and likewise the "generate" sub-menu allows for a (rough) electrostatic surface calculation.
Making a new selection
New selections can be made either by selecting atoms with the mouse or more conveniently clicking on the "S" box on the very bottom right of the Viewer screen. This will give your sequence across the top of the Viewer screen, and allow you to select residues by clicking on them. You can select lots of residues by left clicking one residue, holding down the "shift" key on your keyboard, and then clicking on another residue:
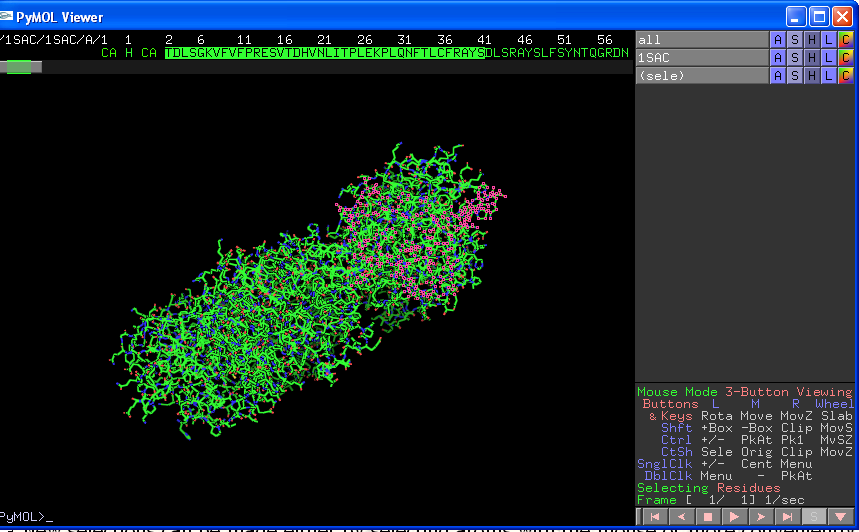
Again you can use the ASHLC buttons to change the properties of this selection (NB if you then change the properties of "all" OR your original pdb file (1SAC in the above example) you will undo the specific properties of your sub-selection). To make a new selection you have to give your first selection a name (select "rename selection" from Actions) before then deselecting the selection (click anywhere in the main section of the viewer window but not on an atom) and then choosing your new selection as before. Be aware that it is very easy to accidentally edit a current selection instead of creating a new selection.
Making Pictures
Once you have made various selections, determined the orientation etc. you can produce a ray-traced picture by either clicking on "Ray" in the Tcl/Tk box or typing ray in the command prompt. You can save the ray-traced picture by selecting File->Save Image. Note that trying to re-orient your molecule will undo your ray tracing. It is probably best to save your picture as a .png file which will be a relatively small but good quality format that can be imported into almost any program (eg word, power point etc.). The size of your image will be the size you see it on your screen. If you would prefer it to be larger or smaller ray trace it using the command ray 1000,1000 where the first number represents your desired x dimension in pixels, and the second your y dimension. Once it has finished ray tracing save the molecule BUT DO NOT TRY TO CHANGE IT'S ORIENTATION!
Some other useful options for making pictures include turning shadows on or off using the Setting ->Rendering menu, or making a white background using the command bg_white. A good idea if you want to print an image is to turn on the "Orthoscopic view" in the display -> Orthoscopic view menu. This removes any geometric distortions used for displaying the image on the screen.
Another fairly cool function is the ability to change the transparency of the surface function to see features lying beneath the surface of the protein. To do this well you generally need to load two versions of the same protein pdb file (giving them separate names) and then set one to surface representation (I normally colour this gray) and the other to cartoon (or sticks etc.). Then select Setting->Transparency->Cartoon and adjust the transparency setting.
PyMOL is awful at labeling so I would suggest making your picture first and then adding labels in MS power point.
Other Functions:
The best way to learn about the thousands of functions within PyMOL is through trial and error. However the following list represents some useful things I have come across:
isomesh msh1,filename,2.0,(chain A),2.0
where msh1 is the arbitrary name of the contoured map, filename is the name of your map (without the .ccp4), 2.0 is the contour level of the map, chain A is where you want to see the map, and 2.0 is the radius around chain A.
You can also try isosurface instead of isomesh, which will show the density as a continuous surface rather than a mesh. It often looks better if you increase the surface transparency to about 80% so that you can still see the atoms when using this option.
A useful addition is the "carve" command that only allows density around the chosen chain e.g.
isomesh msh1,filename,2.0,(chain A),carve=2.0
PyMol will also read x-plor maps so long as they have the extension .map. You can convert map types using the usf program mapman e.g.
setccp4
usf mapman
re m1 mymap.map maptype
(where "maptype" is the map type - accepts OMAP PROTEIN FFT-Y TENEYCK2 CCP4 X -PLOR EZD MASK NEWEZD BINXPLOR BRICK DSN6 3DMATRIX TNT)
no m1 (to normalize the map)
wr m1 mymap.map maptype
(where maptype can be CCP4 OLDEZD MASK NEWEZD ENVELOPE X-PLOR DSN6 BRIX XPLOR CNS EZD AMORE OMAP TURBO)
quit
align move,static
alter 40-52/, ss='L' (show residues 40-52 as loop)
alter 52-65/, ss='S' (show residues 52-65 as sheet)
alter 65-72/, ss='H' (show residues 65-72 as helix)
rebuild (rebuild the secondary structure)
To make a movie showing a 360 degree rotation of your molecule in 600 ray-traced frames, first set up the molecule (ie with cartoons/surface etc.) and then try the following commands (NB the actual size of the frames will be the size of the viewer window):
mset 1 x600 (sets up the movie)
util.mroll(1,600,1) (tells pymol to make one 360 degree rotation in 600 frames)
set ray_trace_frames=1 (turns on ray-tracing for each frame)
set cache_frames=0
mclear (these two commands clear the memory)
mpng mov (this starts pymol automatically making the images mov001.png etc...)