 |
|
|

|
Getting registeredInformation for studentsConnecting from halls of residence Information for staffBooking computer rooms for classes Security, viruses and spamGetting help
|
Installing Staff WTS on Mac OS XCitrix ICA - Mac OS X Client is the software you will need to use Standalone Staff WTS on a Mac machine running OS X. There are two stages needed in order to install the OS X ICA client which can access Information System's WTS service.
This document will guide you though the installation of Citrix ICA clients for Mac OS X. Other documents are available for older versions of Mac OS, Unix/Linux and Windows clients.
Platform SpecificationIS has tried out version 6.30.314 of the Citrix client on the following Macintosh systems:
Downloading the ClientThe tested version of the OS X client can be downloaded from IS: ICA Clients can also be downloaded from the following Citrix site:Select the appropriate client for your platform and save it to disk. Note: more recent versions of the clients may be available from this site which will not have been tested by IS and may or may not work with WTS. Installing the ClientDuring the download the disk image containning the client may already have been expanded and mounted. If it has, you will see the following extra disk icon on your desktop:
If not, double click on the MacICA_OSX.dmg icon to expand and mount it:
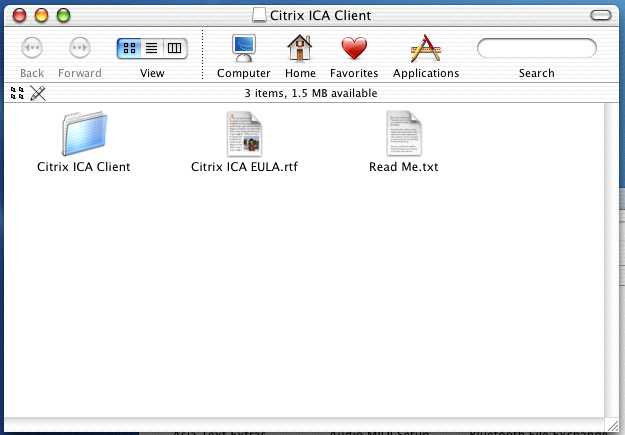
You should now see the following finder window. If it is not displayed, double click on the disk image icon to open it.
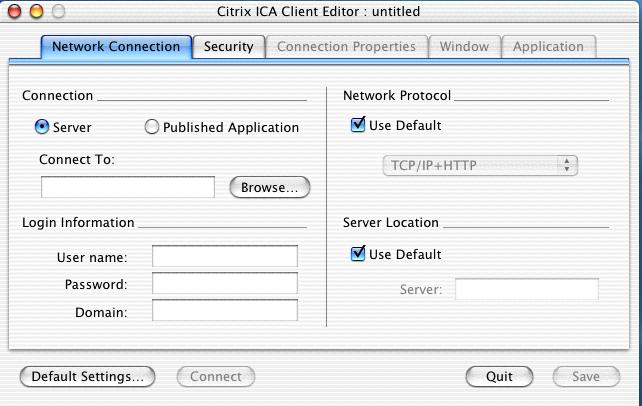
To install the client drag the Citrix ICA Client folder from this widow onto your Applications folder. You can install the client elsewhere but this is probably the simplest place to install it. Configuring the ClientDouble click on the Citrix ICA Client folder in your applications folder. Then double click on the Citrix ICA Client Editor icon to start the Client Editor application. The following window should appear:
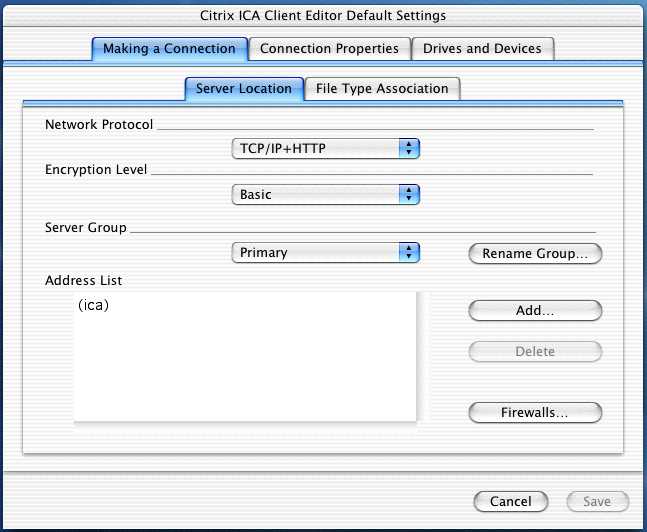
Before you can connect to the Staff WTS service some of the default settings need to be changed so click on the Default Settings ... button at the bottom left of this window. This will open the Default Settings window. If the Making a Connection and Server Location tabs are not shown, click on them. Your window should look like this:
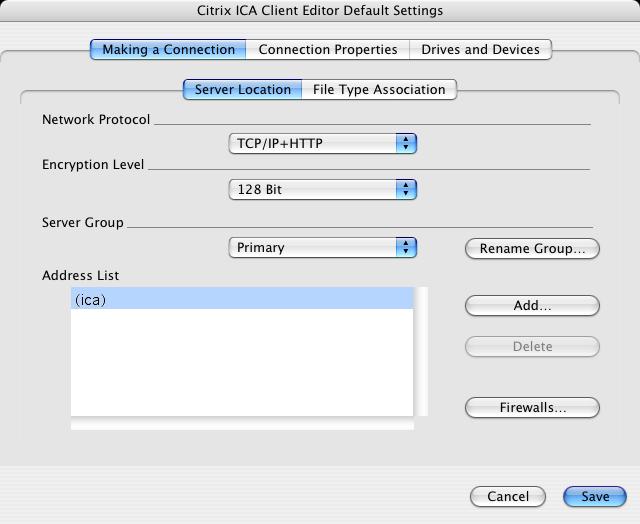
First change the Encryption level to 128 bit. Click the item currently labeled Basic and select 128 Bit from the pop-up list. Your window should now look like this:
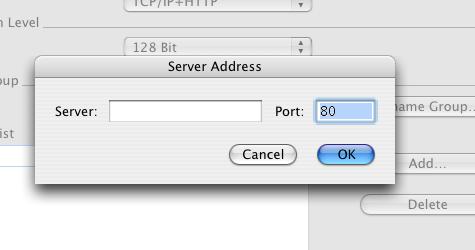
Now check the Network Protocol is set to TCP/IP + HTTP. This is the default setting so you should not need to change it. Now enter the addresses of the two WTS Master Browsers. Click the Add... button to the right of the address list area. A Server Address window should pop up:
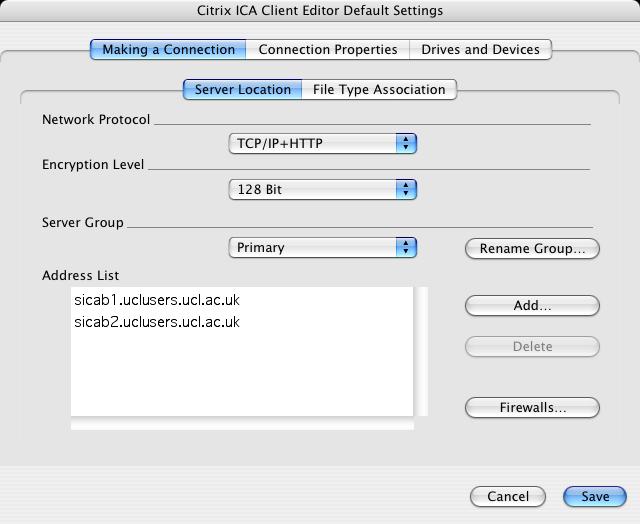
Click in the Server entry box, type sicab1.uclusers.ucl.ac.uk and then click the OK button. The first master browser should now appear in the addess list. Repeat this for the second master browser sicab2.uclusers.ucl.ac.uk Your Default Settings window should now look like this:
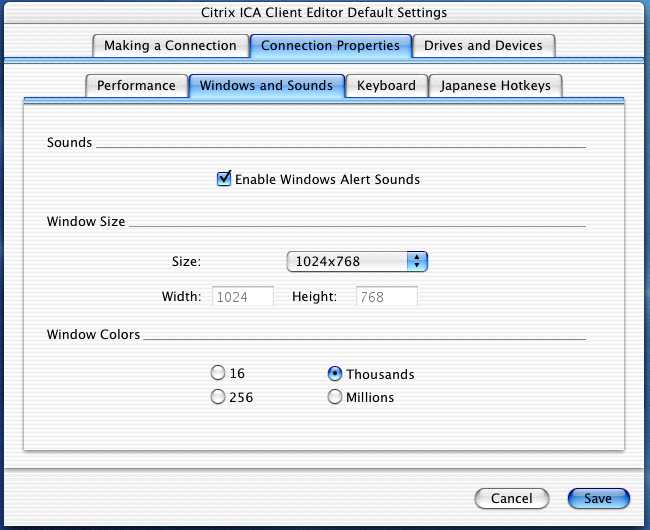
Now click on the Conenction Properties tab and then on the Windows and Sounds tab. Here you should increase the default number of colours and window size provided your Mac supports them. I suggest you increase your window size to at least 800x600 and 1024x768 if possible - to select click on the current value and choose from the drop-down list. The number of colours should be set to at least 256 and preferably thousands - to set click the checkbox next to the value you want to use. Your Default Settings window should now look something like this:
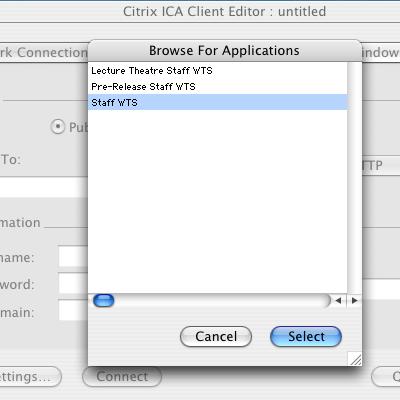
There is no need to change anything else so click the Save button to save your changes. It should now be possible to set-up a connection to Staff WTS, test it and then save the details to a file which you can use as a shortcut to access WTS in future. Click the Published Application checkbox and then click the Browse... button. A Browse for Applications window should pop-up:
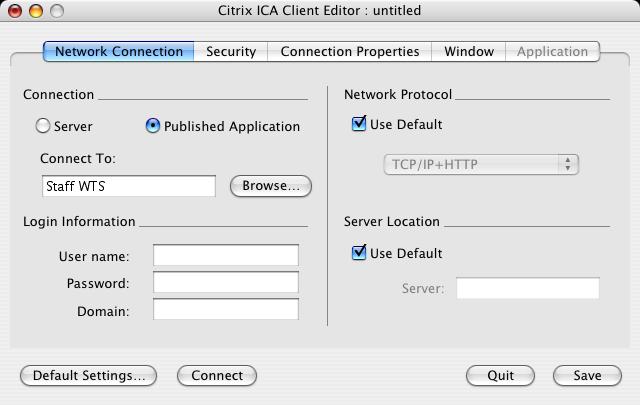
Click on Staff WTS from the available applications and then click the Select button. Your Client Editor window should now look like this:
You can now test your connection by clicking the Connect button. After a short wait a Staff WTS window should open with the normal Staff WTS login prompt. Close the connection by clicking the Cancel button. Click the Save button to save your Staff WTS configuration to a file. A normal Mac OS X save dialog window will appear. Navigate to where you want to save it eg your Desktop, choose a suitable filename eg Staff WTS and save it. Your Client is now configured. You can now exit from the Client Manager by clicking the Quit button. Connecting and Disconnecting to Standalone Staff WTSIf you saved your Staff WTS configuration to the Desktop, all you need do to launch the connection is to double click on the Staff WTS icon. If you saved it somewhere else, navigate to the appropriate folder and then double click on the icon.
A WTS window should open with a Staff WTS login box. Enter your userid and Main UCL password in the appropriate fields, check that the domain shown is UCLUSERS and then click the OK button. You should now be logged in to WTS. After looging in you may get a pop-up ICA window that says a program requires read access to the C drive (the C drive is mapped to a folder on your Mac). Click the Allow button to continue. To finish your Staff WTS session logoff in the usual way by clicking on the Start meun and selecting Logoff.... You will be logged out and your WTS session will close. PC Key Mapping
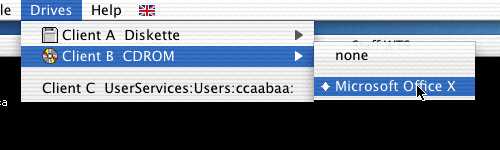
Drive MappingDrive mapping allows you to use directories and removable media from your Mac OS X system under WTS. For example you can set a drive mapping that allows you to use a CD mounted on your Mac as your WTS B: drive. Setting up drive mapping for removable media is best done on the fly after you have the clinet running and you are logged it to WTS. This is because on OS X unlike some other Unix systems mount points for removable media are variable and depend on the volume name. The following example uses the CD drive but other types of removable media work in similar ways. To map a CD first place the CD in you drive and then from the Citrix client's Drives menu select the Client B CDROM sub-menu and then select your CD's volume name. Like this:
Now you can see the contents of the CD from WTS using either Windows Explorer or My Computer and selecting B$ on 'Client' (B:). Other types of removable media will appear in the Client A Diskette sub-menu of the Drives menu. Note: your Mac home folder is normally automatically mapped to the WTS C: drive. Printing from Standalone Staff WTSThe Mac OS X client supports client printer mapping which allows you to print from appications running on WTS to local and networked printers known to your Mac workstation. With the OS X client client printer mapping is setup automatically. On WTS the name of your client printer is Your OS X username#Mac Printer - for example on my home machine it is brian#Mac Printer. You can make this your default printer in a WTS session in the usual way. When you print to this printer, the default behaviour will pop-up the normal OS X print dialogue where you can choose the printer to use etc. This page last modified May 11, 2004 by Brian Alston |