How to install ArcGIS for Windows
This guide explains how to install ArcGIS for Windows
This guide explains how to install ArcGIS for Windows downloaded from UCL Software Database.
This guide is aimed at...
- Students
- Staff
- Researchers
Before you start...
The following needs to be downloaded from UCL Software Database.
- the correct ArcGIS version
- Read and understood the UCL Information security policy in particular the UCL Computing Regulations (Acceptable Use Policy)
- Before installing ArcGIS please ensure ArcGIS Desktop has finished downloading and you are connected to the UCL network. You can use the VPN Service if you're not. Click on the link for VPN instructions.
Instructions
1. Download the appropriate ArcGIS version.
2. Open the downloaded ArcGIS.exe file
3. Select destination folder for the setup files to be extracted to

Fig 1. Extract installation files

Fig 2. Click close to launch setup

Fig 3. Click next to continue

Fig 4. Accept ArcGIS EULA
5. Select installation type - the default is Complete. This will install all ArcGIS components

Fig 5. Select installation type

Fig 6. Select destination folder
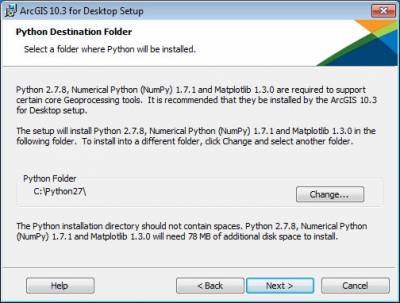
6. ArcGIS requires the Python programming language to be installed. Select installation destination folder.

Fig 7. Select Python destination folder
6. Select whether or not you wish to take part in the User Experience Improvement program. Default is yes.

Fig 8. Click install to install software

Fig 9. Click finish to complete installation
5. Delete installation files from directory specified at the beginning
6. Finish
Related guides & other info
- How to Activate ArcGIS
- How to Install CityEngine
- How to Install ProductivitySuite
- Searching for details of software package or application
- Downloading software
- Installing software you have downloaded
- Connecting to the UCL VPN
Help & Support
For further help and assistance you will need to contact the IT Services.
Feedback
We are continually improving our website. Please provide any feedback using the feedback form.
Please note: This form is only to provide feedback. If you require IT support please contact the IT Services Help desk. We can only respond to UCL email addresses.
 Close
Close

