 Close
Close

Create a meeting in Outlook 2016 for Mac
To schedule a meeting, you create an invitation that you send to attendees. Responses to your invitation (e.g. accept/decline) will appear in your Inbox.
This guide is aimed at...
- Staff
Instructions
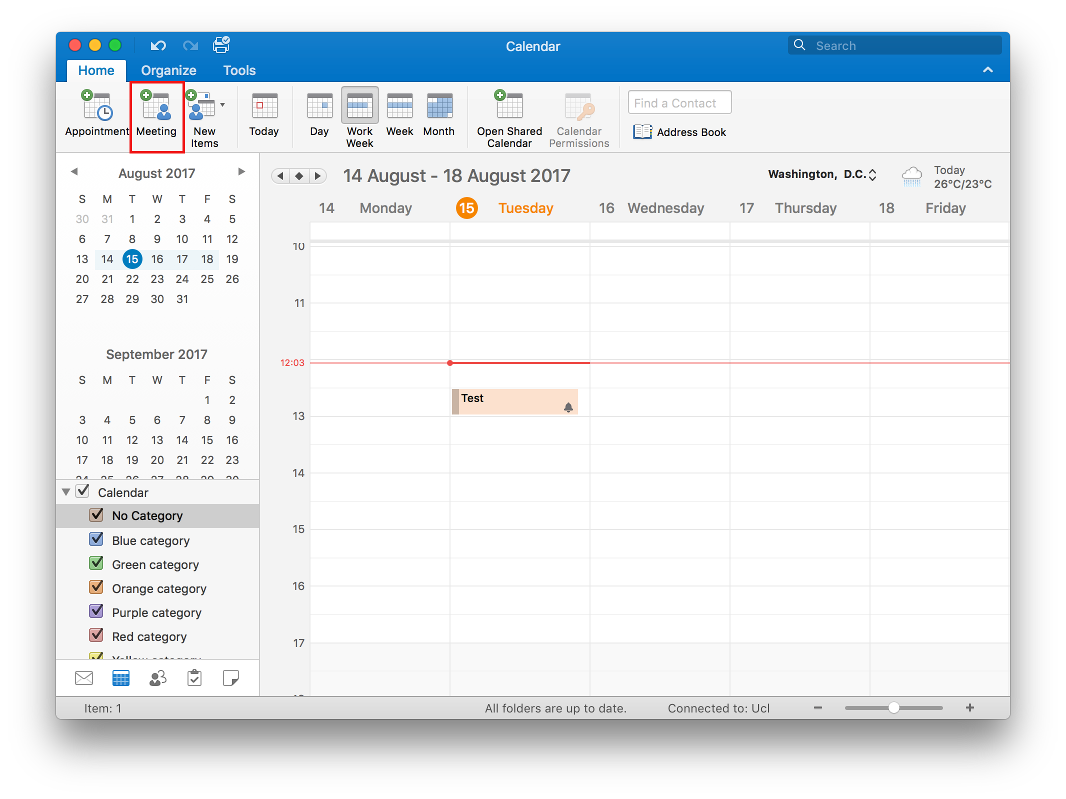
1. In Calendar view, click on the Meeting button on the top left of the page.

Fig 1. Location of Meeting button
View a larger image
2. Fill in the necessary information for the meeting you want to set up.
To: Attendee to be invited to the meeting.
Subject: Subject title for the appointment.
Location: Type the location of where the meeting will occur.
Starts: Select the date and start time of the appointment.
Ends: Select the date and end time of the appointment. Alternatively, use the Duration list to determine the length of the meeting.
Message box: Type in any description or details of the appointment for your own reference.
Click Send once you have completed the necessary details.

Fig 2. Example of a Meeting window
View a larger image
4. There should now be an entry for the meeting within your calendar. An invitation would also have been sent to the attendees previously specified within the To field of the meeting.

Fig 3. Example of a new meeting in a calendar
View a larger image
Related guides and other info:
- Get started with calendar
- Change calendar view
- Create an appointment
- Modify an appointment
- Create a repeated meeting
- Create an all-day event
- Modify a meeting
- Share your calendar
- View another person's calendar
Help and support
- Contact the IT Services.
Feedback
We are continually improving our website. Please provide any feedback using the feedback form.
Please note: This form is only to provide feedback. If you require IT support please contact the IT Services Help desk. We can only respond to UCL email addresses.