 Close
Close

Connecting to the UCL VPN with Apple iOS (iPhone, iPad)
This guide explains how to connect to the UCL Virtual Private Network (VPN) which gives access to a variety of UCL services and resources from outside of UCL.
This guide is aimed at...
- Staff
- Students
- IT Administrators
- SLMS staff
- Researchers
Before you start...
- You must be aware of and abide by the UCL Computing Regulations
- You must be aware of and abide by the JANET Acceptable Use Policy
- You need your UCL user ID & password – found on the front of your registration slip
- An internet connection outside the UCL network e.g. from home
- A Mac with anti-virus installed (see Anti-virus requirements)
Instructions
- Go to the App Store

Fig.1 – App Store icon - Search for "Cisco AnyConnect" and install by clicking GET or cloud icon
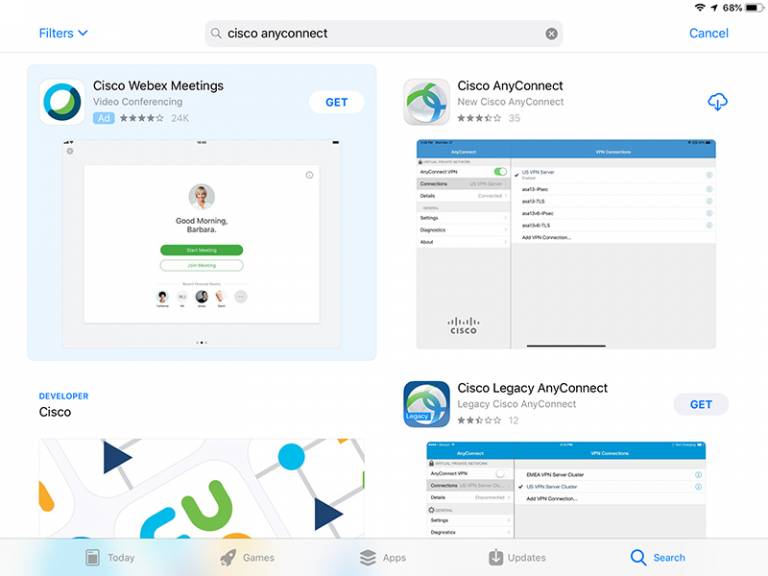
Fig.2 – Cisco AnyConnect in App Store - Open Cisco AnyConnect

Fig.3 – Cisco AnyConnect app icon - Choose your "AnyConnect" Would Like to Send You Notifications preference
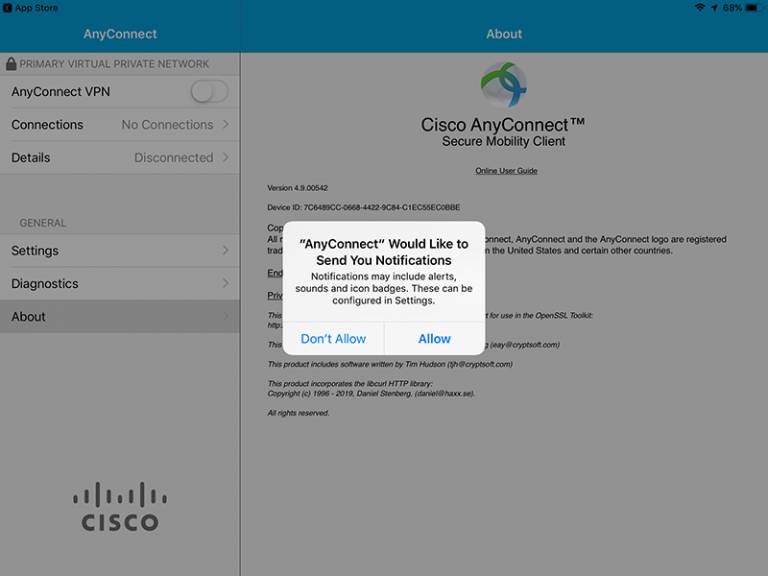
Fig.4 – "AnyConnect" Would Like to Send You Notifications - Click Connections from the menu then Add VPN Connection...
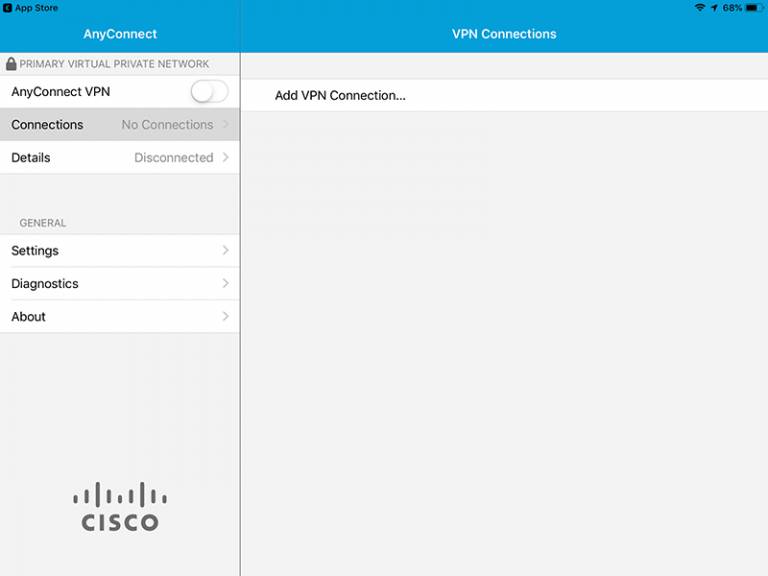
Fig.5 – Add VPN Connection... - At the Add VPN Connection window, enter the details as below:
Description: You can call this what you like (we've chosen UCL VPN for this guide)
Server Address: vpn.ucl.ac.uk
Advanced: Click Advanced and go to the next step
Fig.6 – Add VPN Connection details - Make sure Network Roaming is disabled (as pictured below)
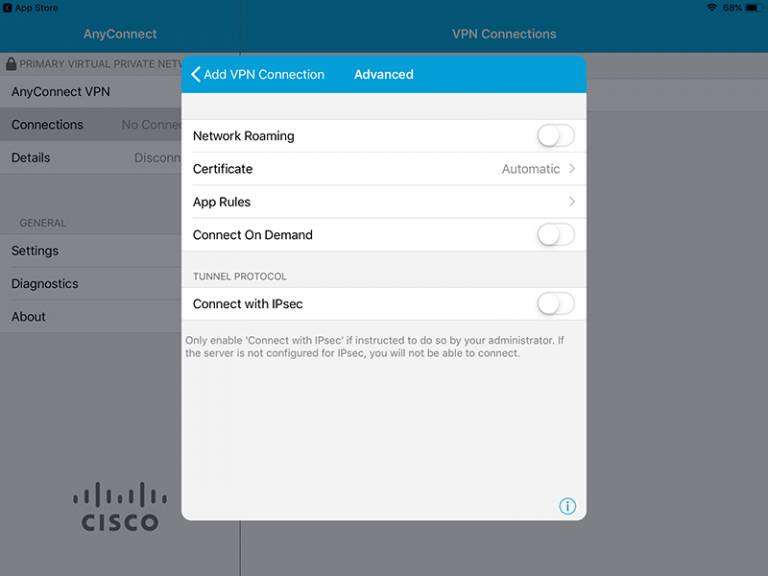
Fig.7 – Add VPN Connection (advanced options) - Go back and click Save
- Click Allow at the "AnyConnect" Would Like to Add VPN Configurations notification
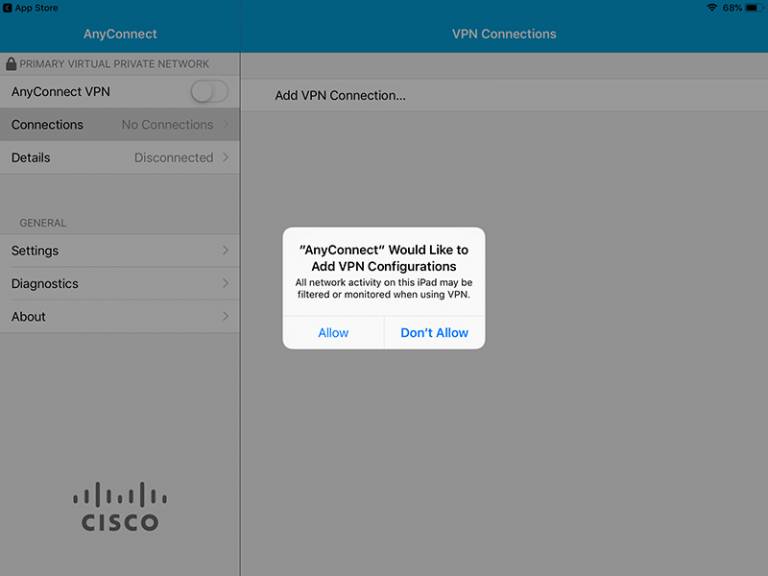
Fig.8 – "AnyConnect" Would Like to Add VPN Configurations notification - If prompted, enter your iPad/iPhone passcode to Add VPN Configurations
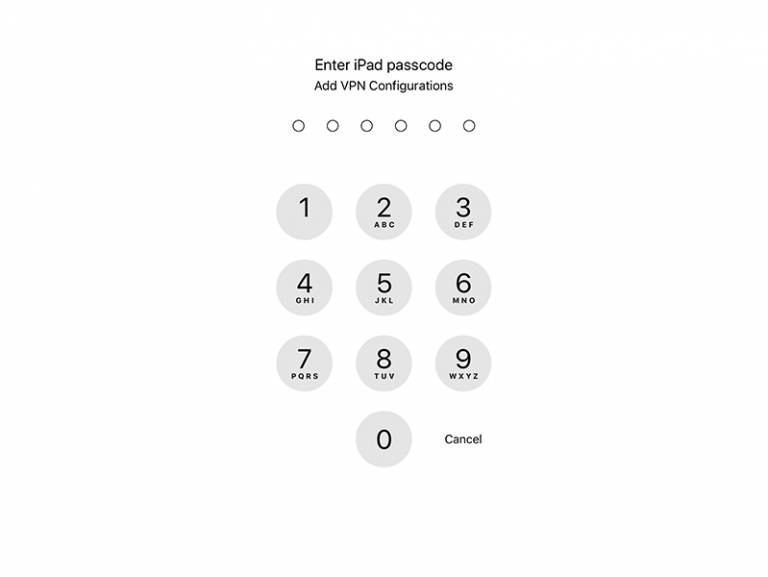
Fig.9 – Enter iPad passcode - When the connection is Enabled (a tick will display next to the connection), click the AnyConnect VPN switch

Fig.10 – Connection enabled At the Authentication window, enter the details as below and click Connect
Group: RemoteAccess
Username: Your UCL userID@ucl.ac.uk
Password: your UCL passwordThe Remote Access VPN now uses Multi Factor Authentication (MFA), this provides additional security and means you won’t have to enter your credentials every time you log in.
There are more details on how MFA works on the link below: https://www.ucl.ac.uk/isd/services/stay-secure/multi-factor-authentication-mfa
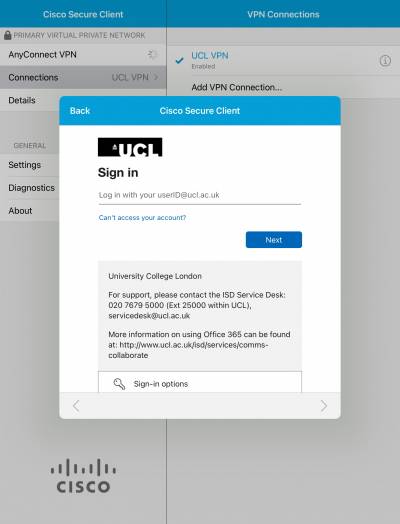
Fig.11 – Enter your username and passwordWhen successfully connected to UCL's VPN, a VPN icon will appear in the top-right corner.
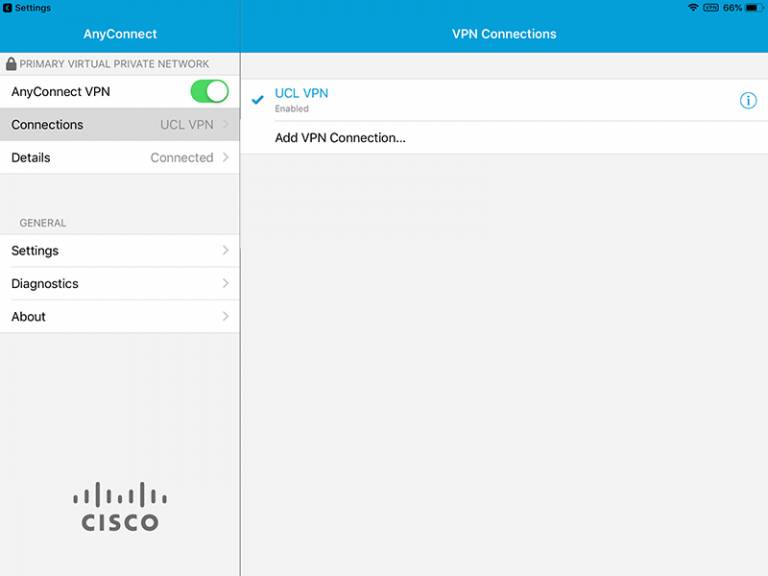
Fig.12 – AnyConnect connected to VPNTo disconnect from UCL's VPN, click the AnyConnect VPN switch to the off position.
Feedback
We are continually improving our website. Please provide any feedback using the feedback form.
Please note: This form is only to provide feedback. If you require IT support please contact the IT Services Help desk. We can only respond to UCL email addresses.