 Close
Close

Add a signature in Outlook 2016 for Windows
Create an email signature that appears at the end of your messages automatically or can be added to individual messages.
Instructions
In a New Message window:
1. Click on the Message tab at the top of the new message. Select the Signature drop-down list and select Signatures...

Fig 1. Location of the Signatures option
View a larger version
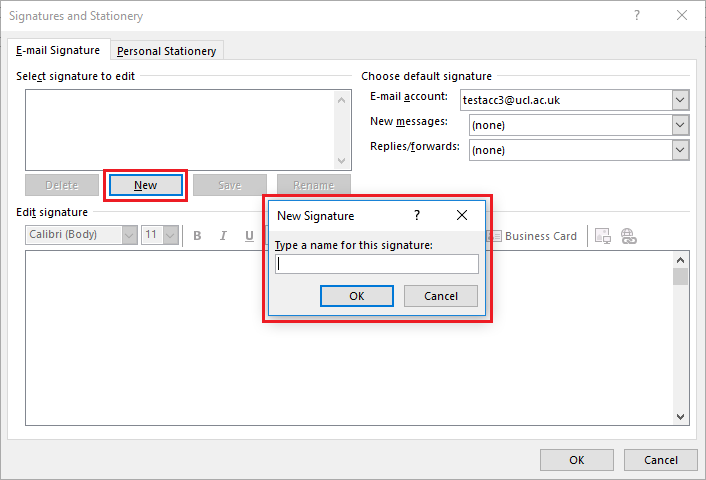
2. In the Signatures and Stationary window, click on the New button and specify a name for the signature you are going to create.

Fig 2. New Signature box
View a larger version
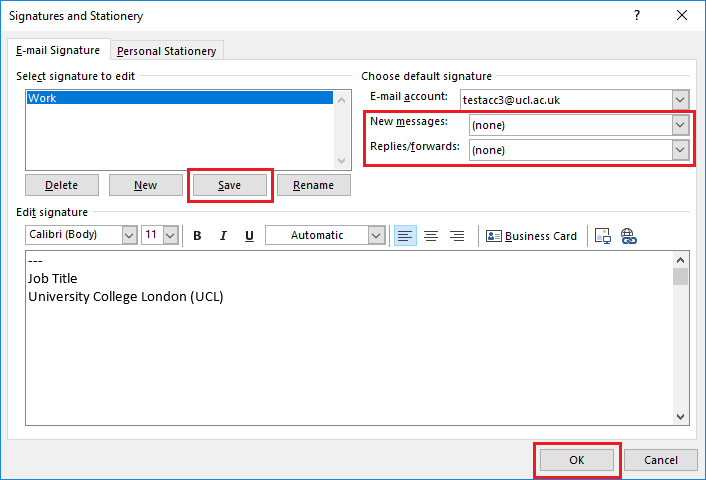
3. The signature template has now be created. Fill in your signature details within the provided text box at the bottom of the window. Select Save.
If you would like to set the signature to appear as default on all new messages and/or any replies or forwards, select the name of the signature from the new messages or replies/forwards drop-down menu.
Select OK to accept the changes and close the window.

Fig 3. Example of a signature
View a larger version
4. Your signature has now be saved. If you have specified the signature to appear as default, the text provided should now be visible when composing a new message and/or any replies and forwards you send.
If you did not specify a default signature, you can add the signature to any message by selecting it within the Signature drop-down list.

Fig 4. Add your signature to a message manually
View a larger version
Related guides and other info:
- Delete messages
- Add an attachment
- Create a message rule
- Show/hide bcc field
- Send email in HTML or plain text
- Search for messages
- Recover deleted messages
Help and support
- Contact the IT Services.
Feedback
We are continually improving our website. Please provide any feedback using the feedback form.
Please note: This form is only to provide feedback. If you require IT support please contact the IT Services Help desk. We can only respond to UCL email addresses.